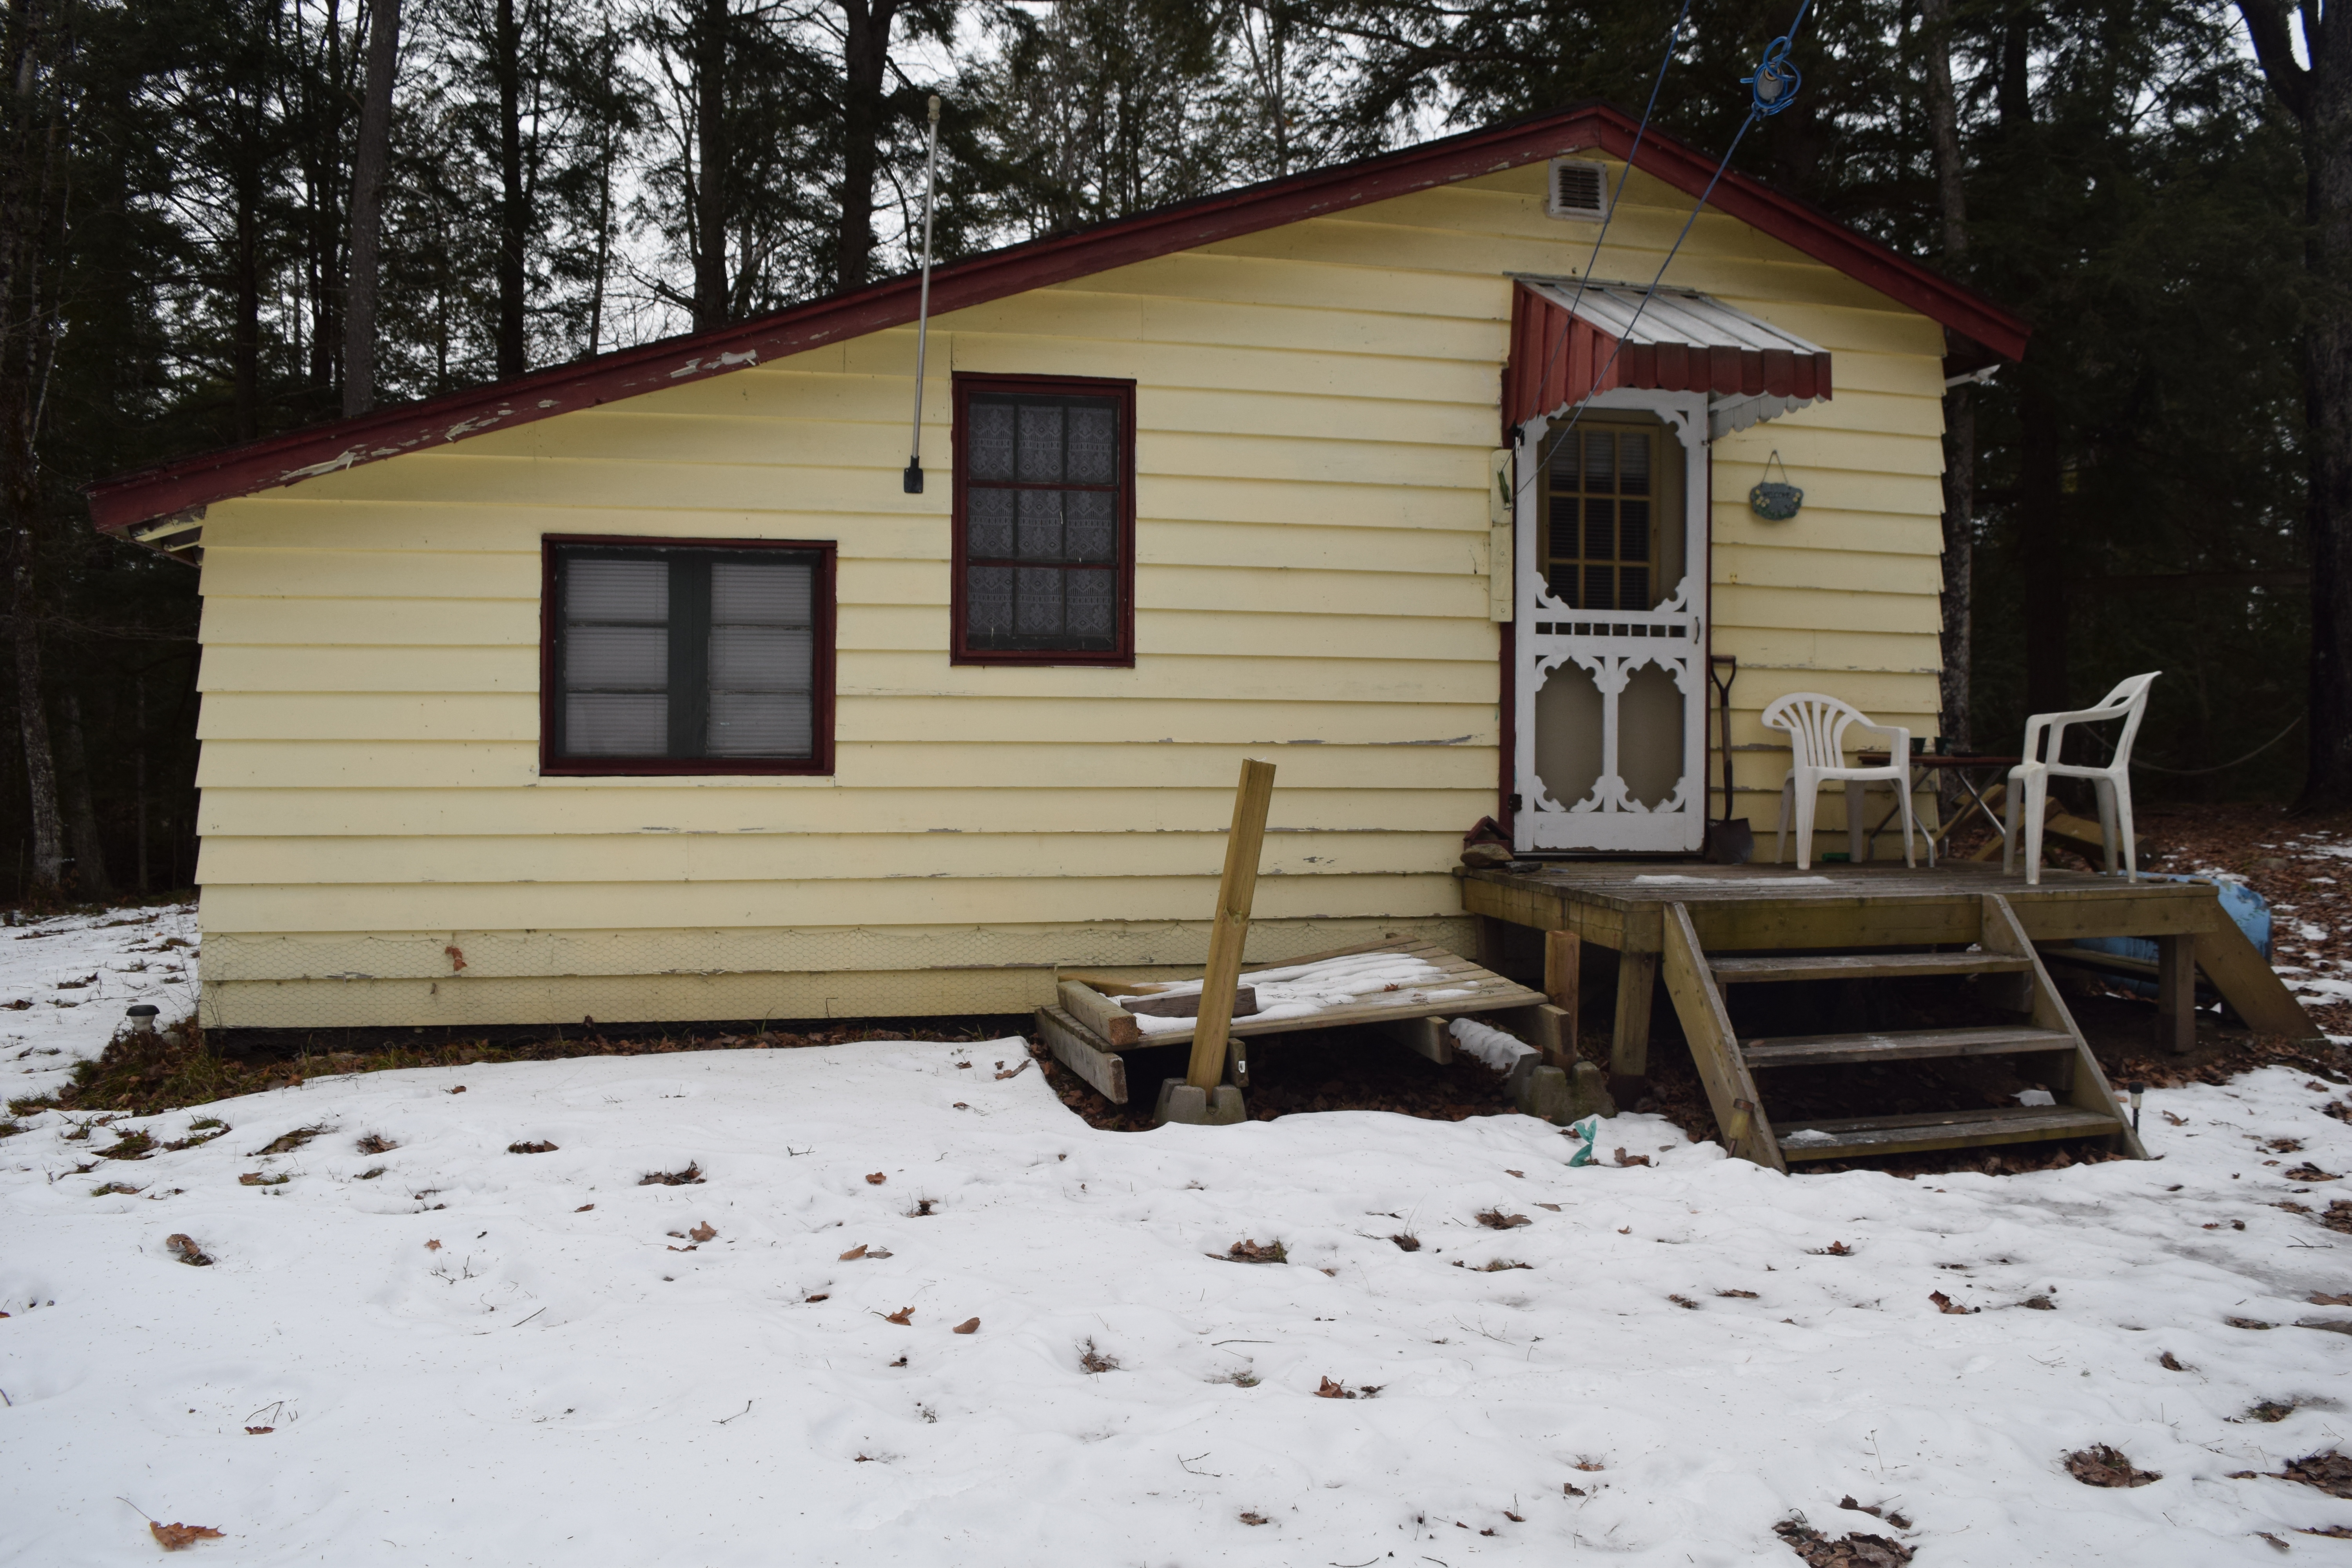
The land on which our tiny cabin sits, and the surrounding area, is scrubby and varied. There are rocky hills and mossy rocks, trilliums and a floor of needles and maple seedlings. You must always watch your footing so that you don’t trip over a root, a rock or unexpectedly step down into a divot.
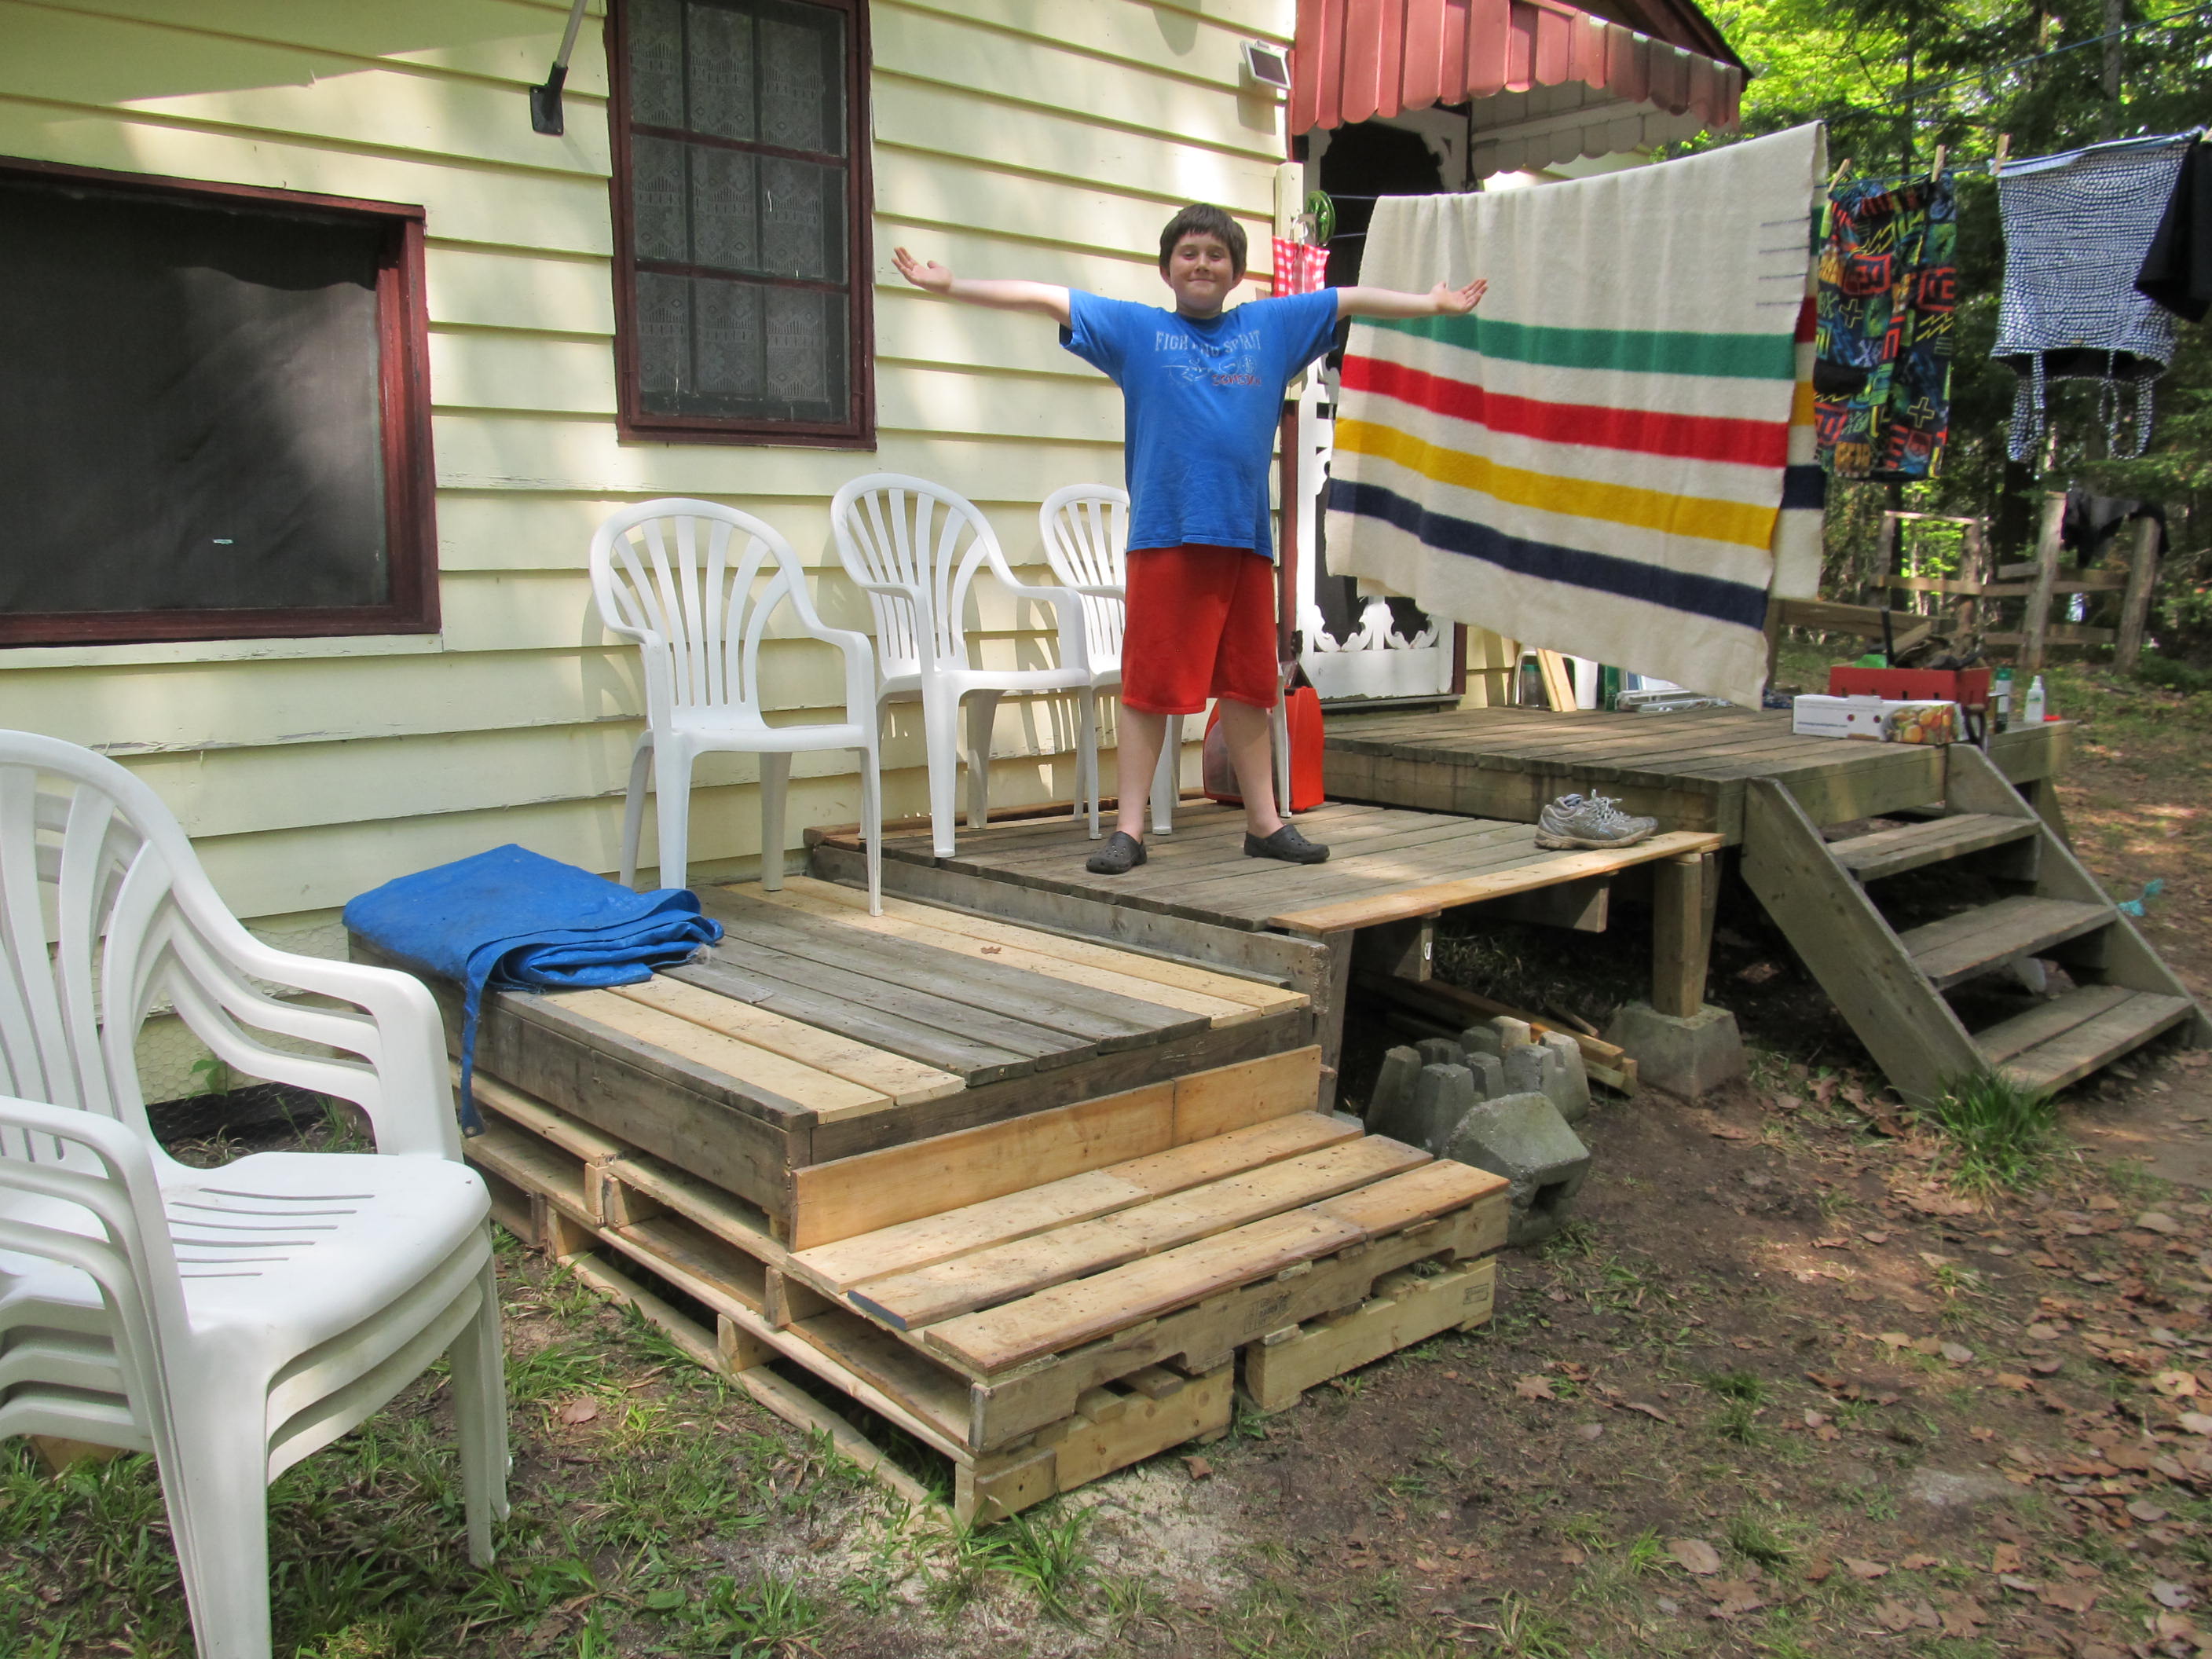
When we took possession of this little place, we knew one of the first things we wanted to work on was building an inexpensive deck so that we could sit outside without falling over in our chairs on the uneven terrain. The cabin had only a small landing and a few stairs by the side door. Beside it, there was a dilapidated section that looked as if it was either a deck at one time or never quite made it to deck status.
Neither of us had ever built a deck before and we wanted it to be fast, easy and inexpensive. We also needed to make it with as little electrical power as possible since we were only borrowing a generator for one day. Our cheapest option was making the deck out of pallets. Pallet projects are everywhere on Pinterest and they make it look really easy and beautiful. As with everything, a pallet deck still takes a lot of preparation to look good. We cut a few corners because of the lack of electricity issue so what we finished with is solid and stable but not exactly Pinterest-worthy.
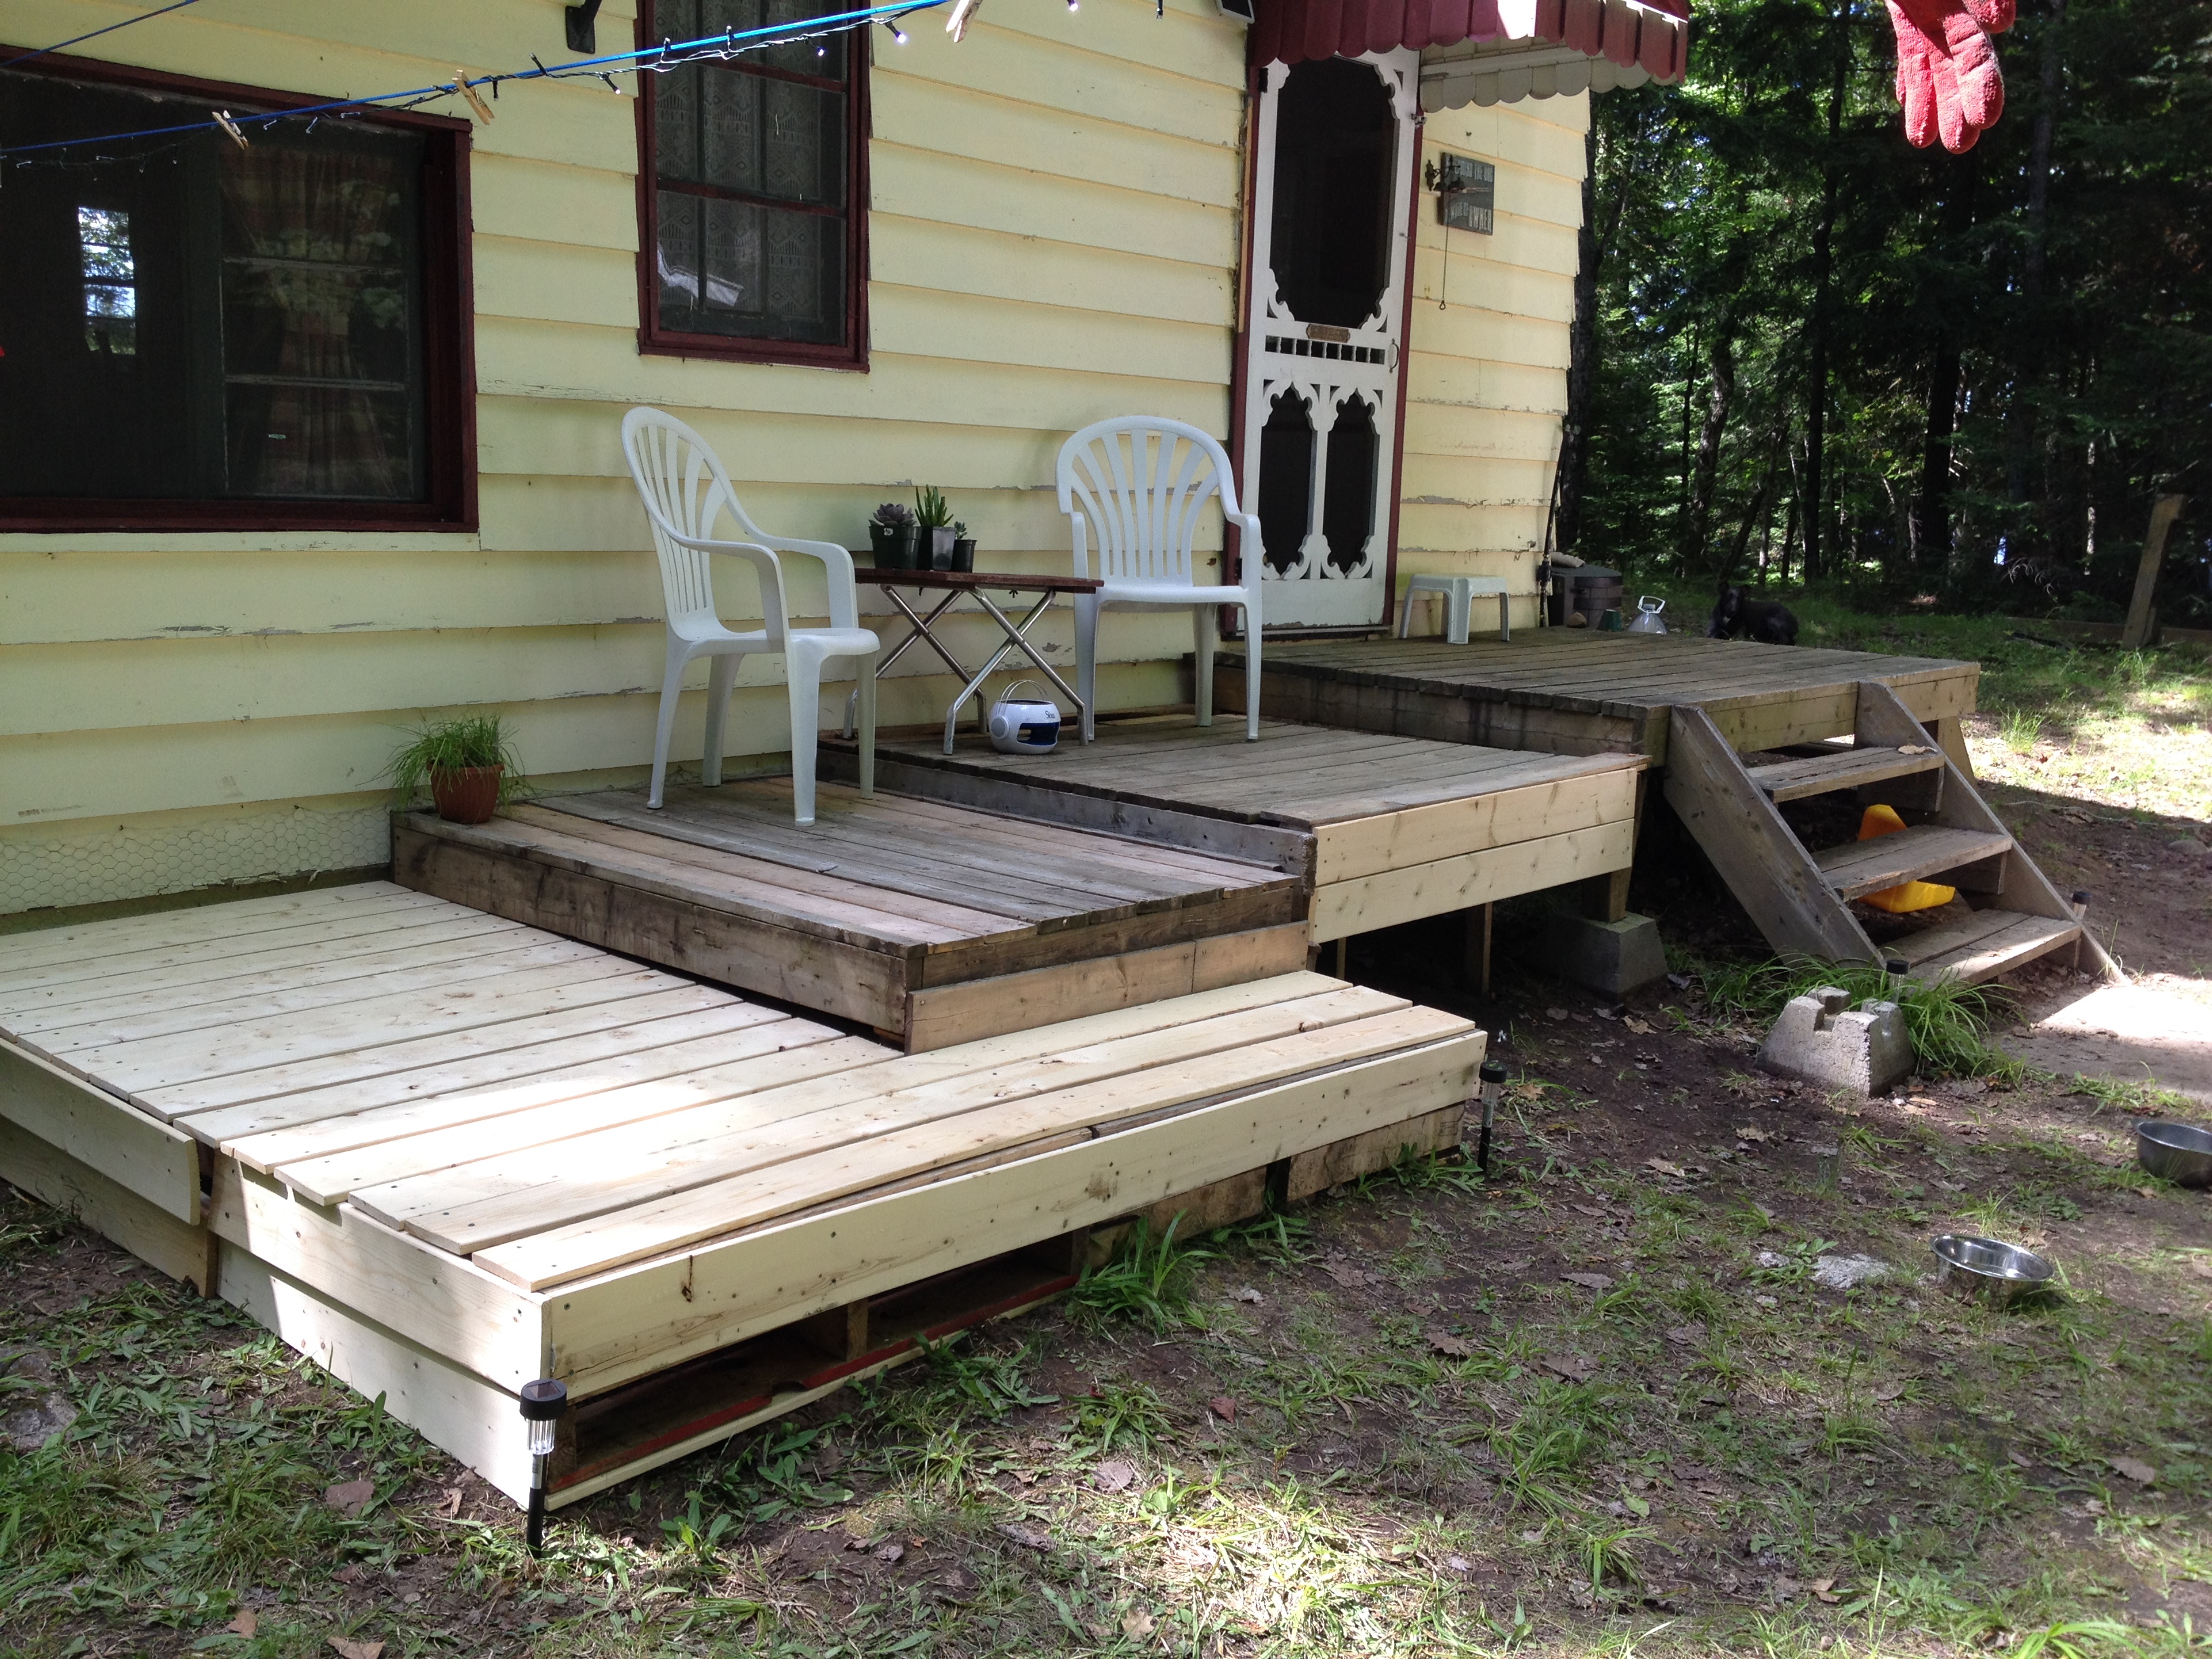
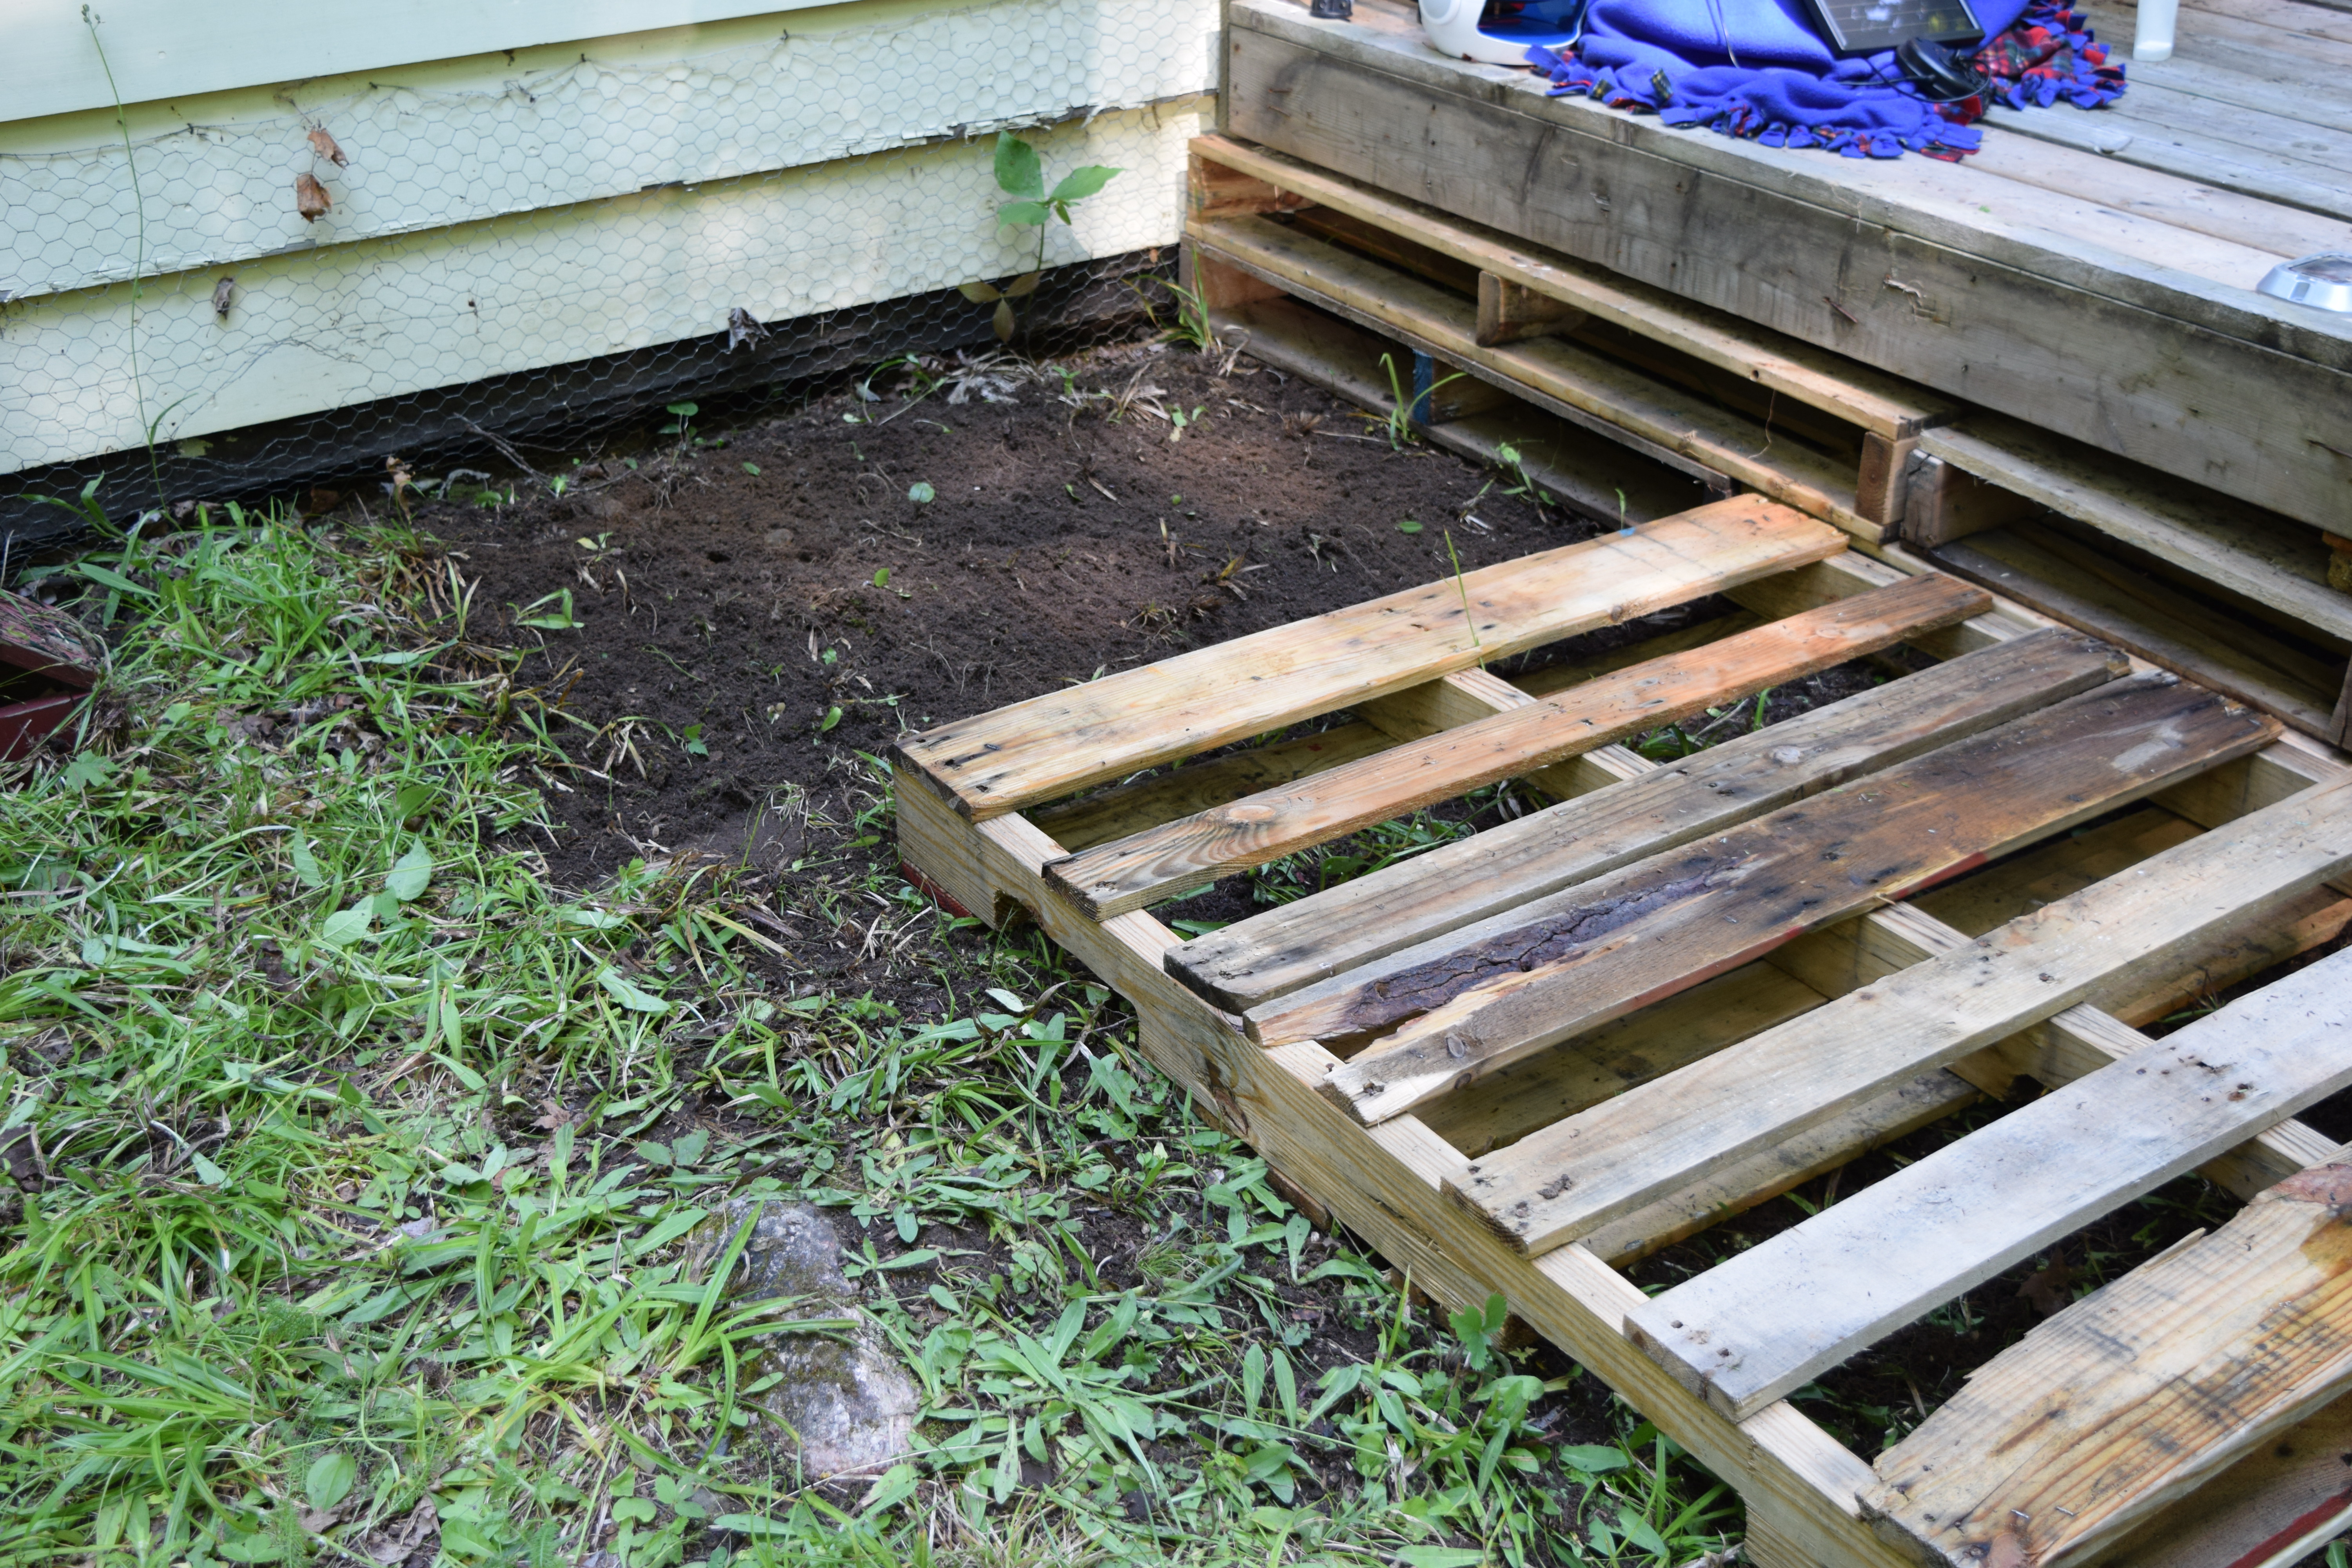
The cheap lumber and the pallets will not last forever. But they will last long enough for us to get better acquainted with what we really want, to learn the process of building a “real” deck and to save some money to buy the proper supplies. The tiers worked out very well because as you can see the windows are lower as you move away from the door. We originally thought we wanted to put the BBQ on this side but soon realized, we wouldn’t have the room. Another reason that we didn’t want to spend too much money on it was because we are still learning the quirks of the cabin. There are pipes from the kitchen and the indoor toilet that lead out from under the deck to the dry well. We may discover something later that will force us to get rid of or move the deck in order to fix the problem. (If we remove the long front pieces of lumber, the whole last section can simply be pulled out.)
Notice there are four distinct sections. The section with the stairs was the original. It was well-built, sturdy and other than our having to replace one step, will most likely last a very long time. The second and third sections, going left from the door, were made by my partner-in-crime (aka Soldier Boy) while I was up on the roof trying to fix the skylight leak. He simply raised up the platform and braced it underneath with the lumber we had lying around. Even though the cabin was in pretty rough shape when we got it, it was evident by the remnants of lumber, rain barrels, hardware, and building supplies that they’d had the intention of making improvements to it. This worked out for us because it meant that we could save money by reusing the wood that was already there.
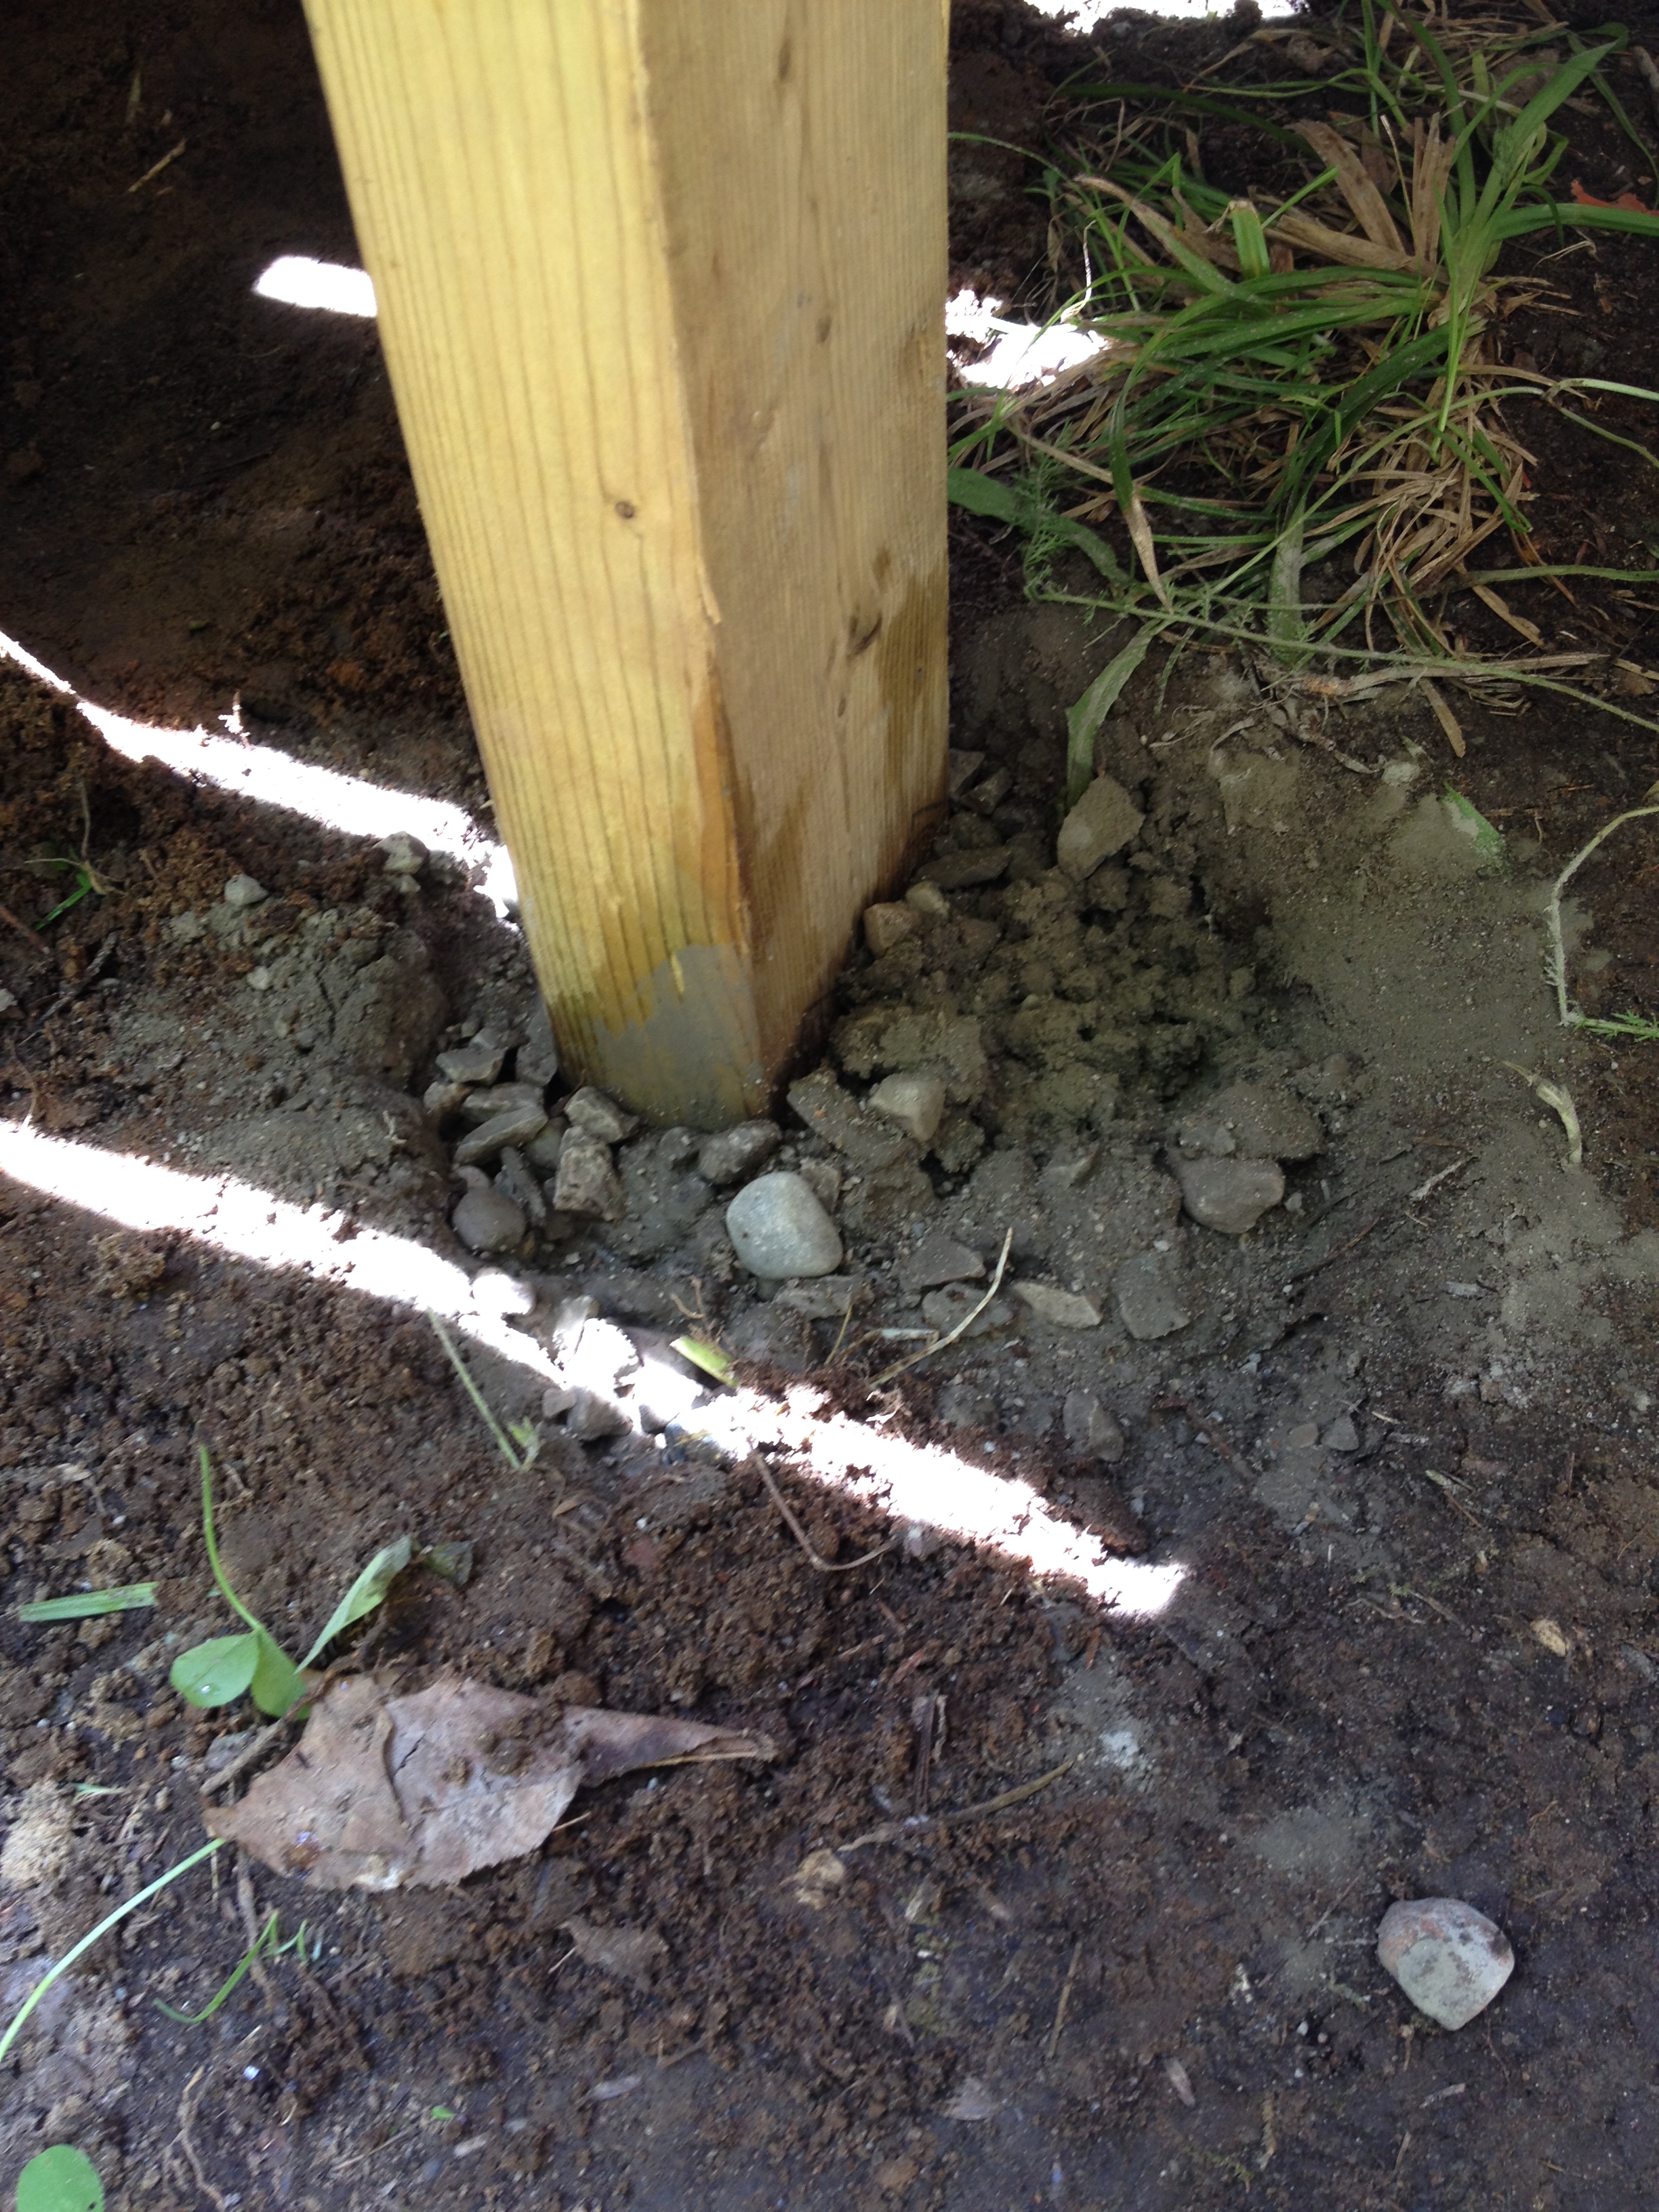
We found several concrete footings that we reused for the second section. Then Soldier Boy dug holes for more posts and filled them with Sakrete (a 30kg bag found at Home Depot for $4), a concrete mix that is the easiest thing in the world to use. Dig a hole, fill it 3/4 of the way with Sakrete, fill the rest of the hole with water, stir with a stick, put the post in, let it set for 2 hours. Voila!
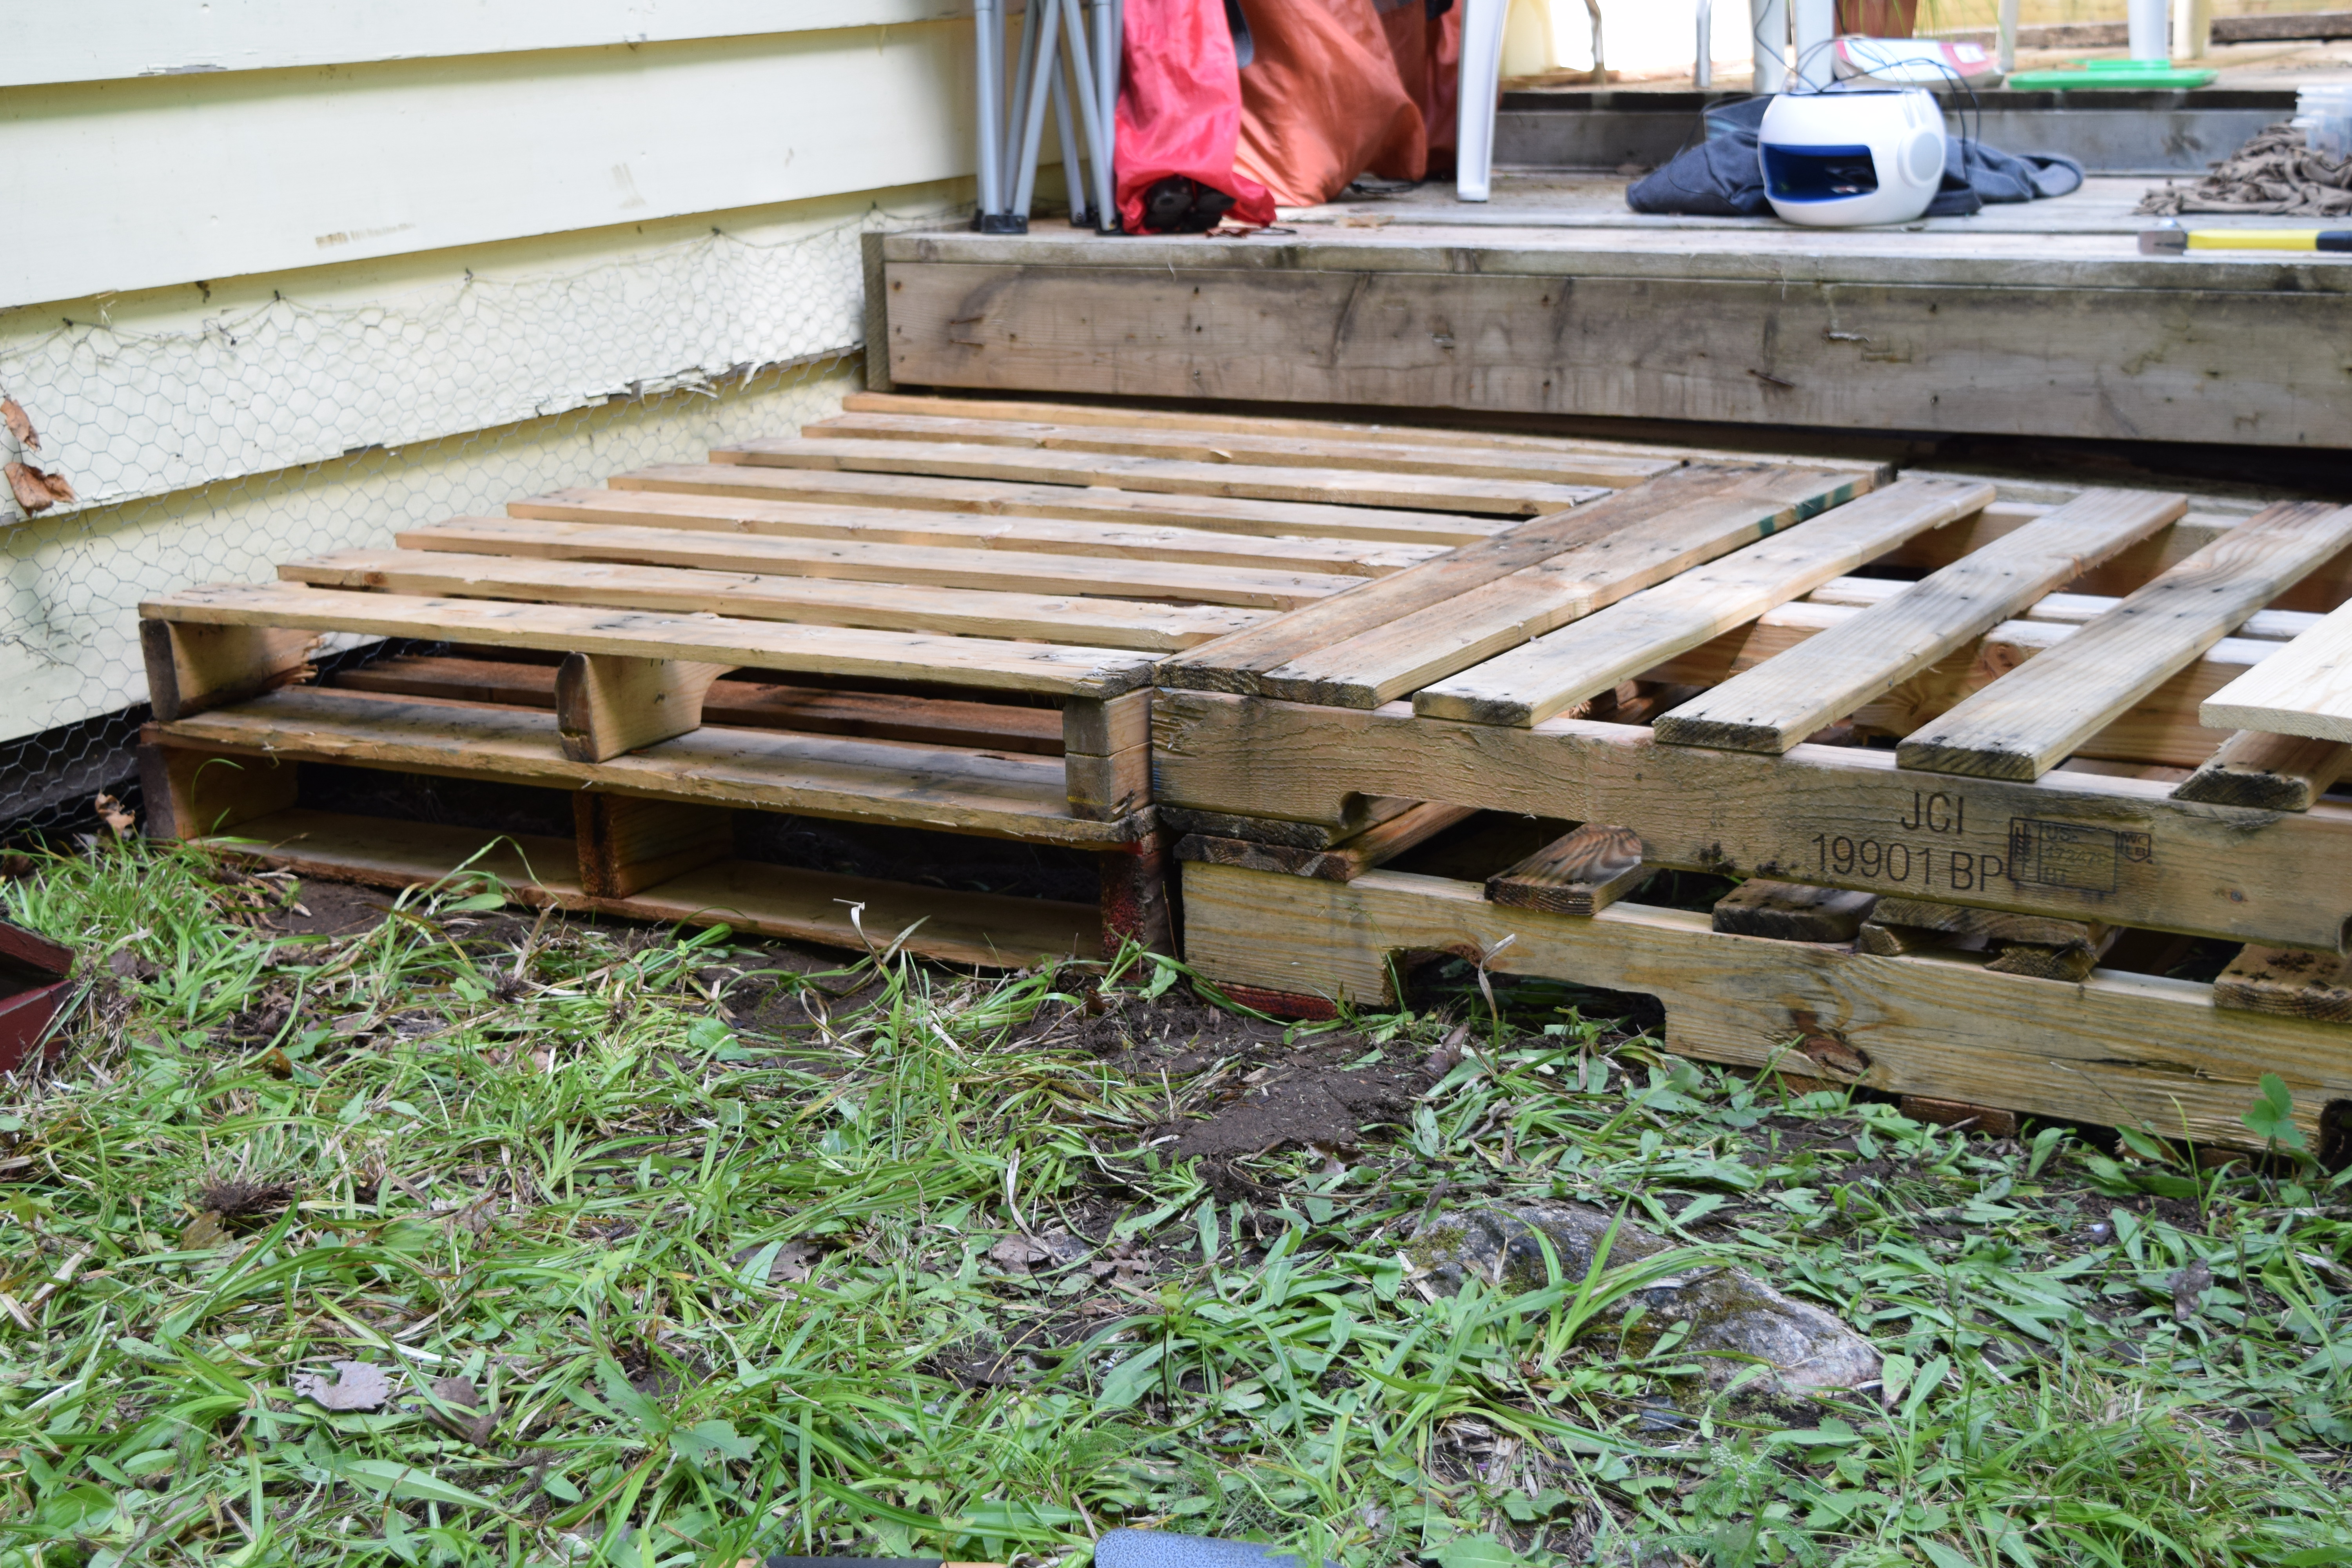
The third and fourth sections were made on two different days but made the same way. We had been collecting pallets all winter because we had lots of fun ideas for them and they are in our price range. (Read more about gathering and using pallets.)
We had measured the pallets at home and brought out the ones that were the same size. These we simply stacked them on top of each other, on the ground, until they were high enough and made the tiered steps. Because we were simply placing pallets on the ground and not digging holes and using posts, as you would on a “real” deck, the ground needed to be levelled. This was actually really hard for us because the land is very rocky where we are. Sometimes, what looked like a small rock, when removed, ended up being like an iceberg – most of it was under the surface!
After the pallets were placed down and secured, Soldier Boy and his son used the lumber that we were given to cover it.
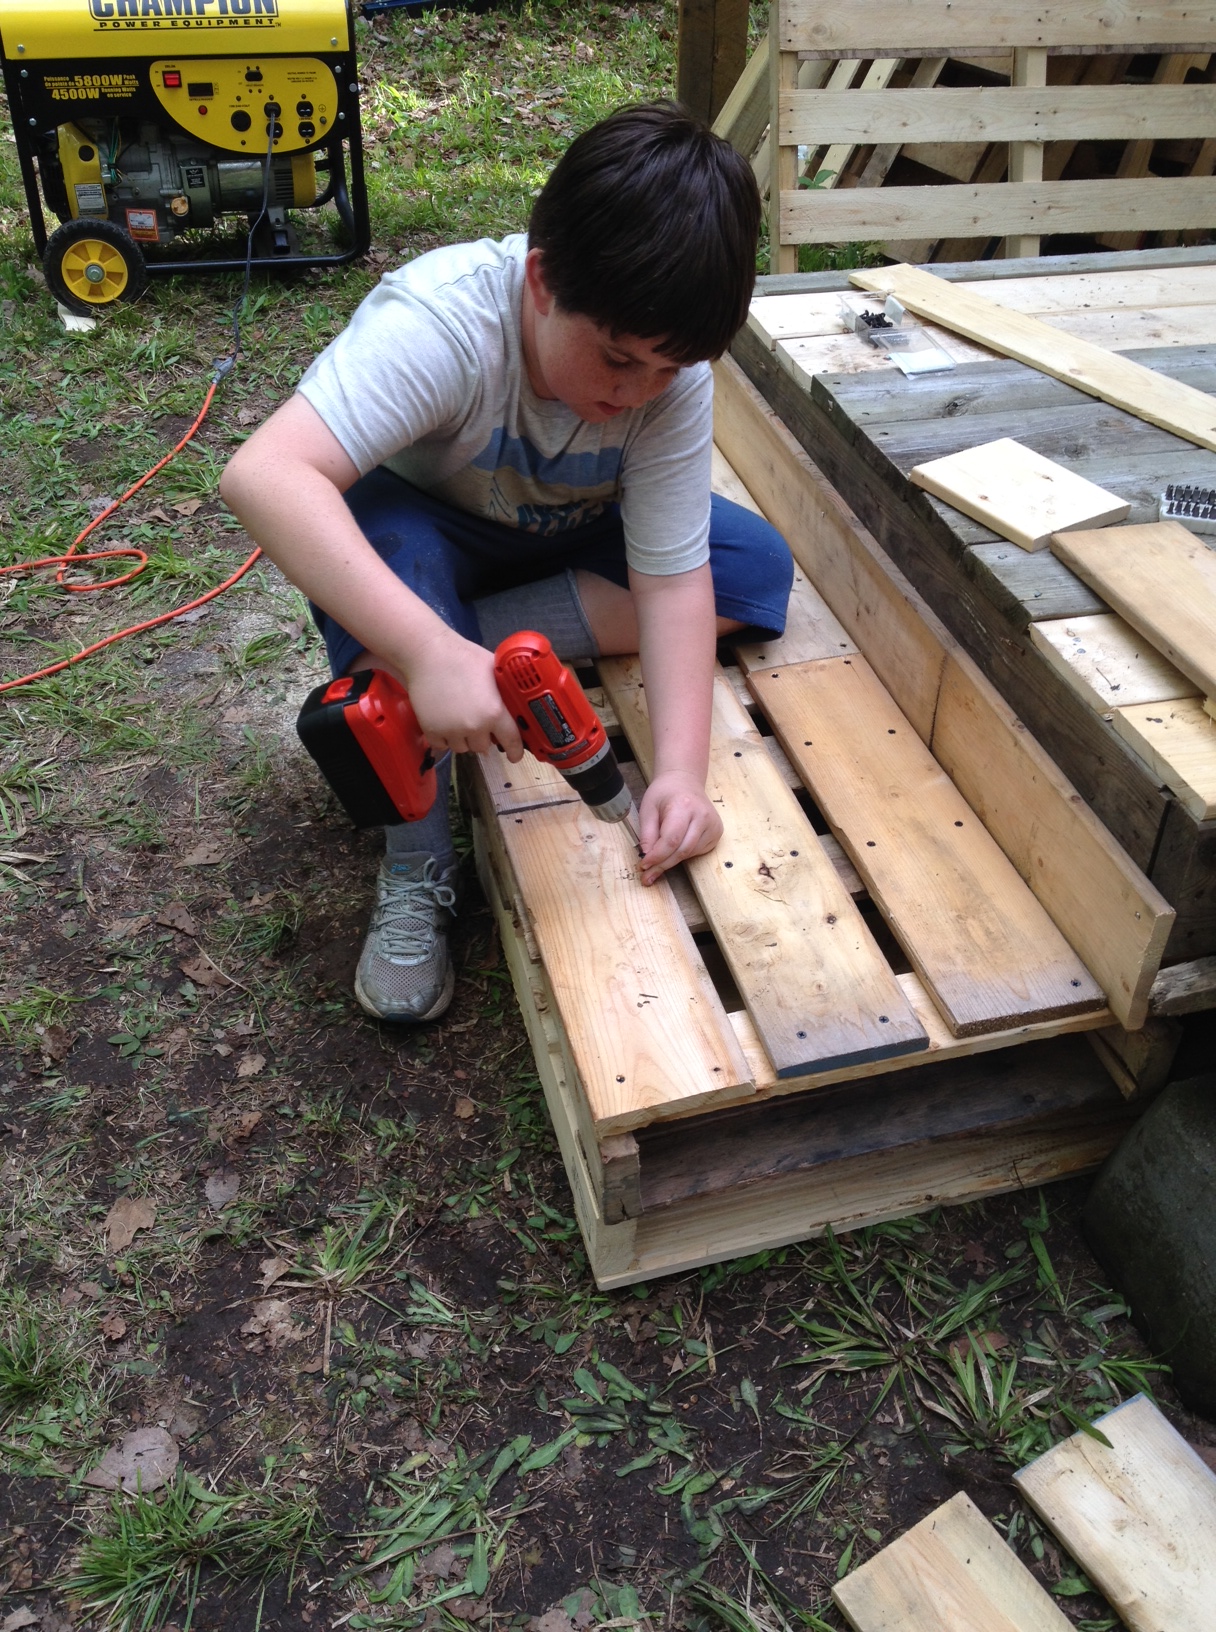
The last section was built the following weekend. I wanted to do the last section because I wanted the experience of helping to build the deck as well. Following the same process as above, we measured out the pallets, leveled the ground, placed them on the ground, fastened them together and covered them. At this point, we had no more usable lumber left so we went to Home Depot and bought the cheapest lumber we could find (1×6) and had it cut to fit (cost us about $30).
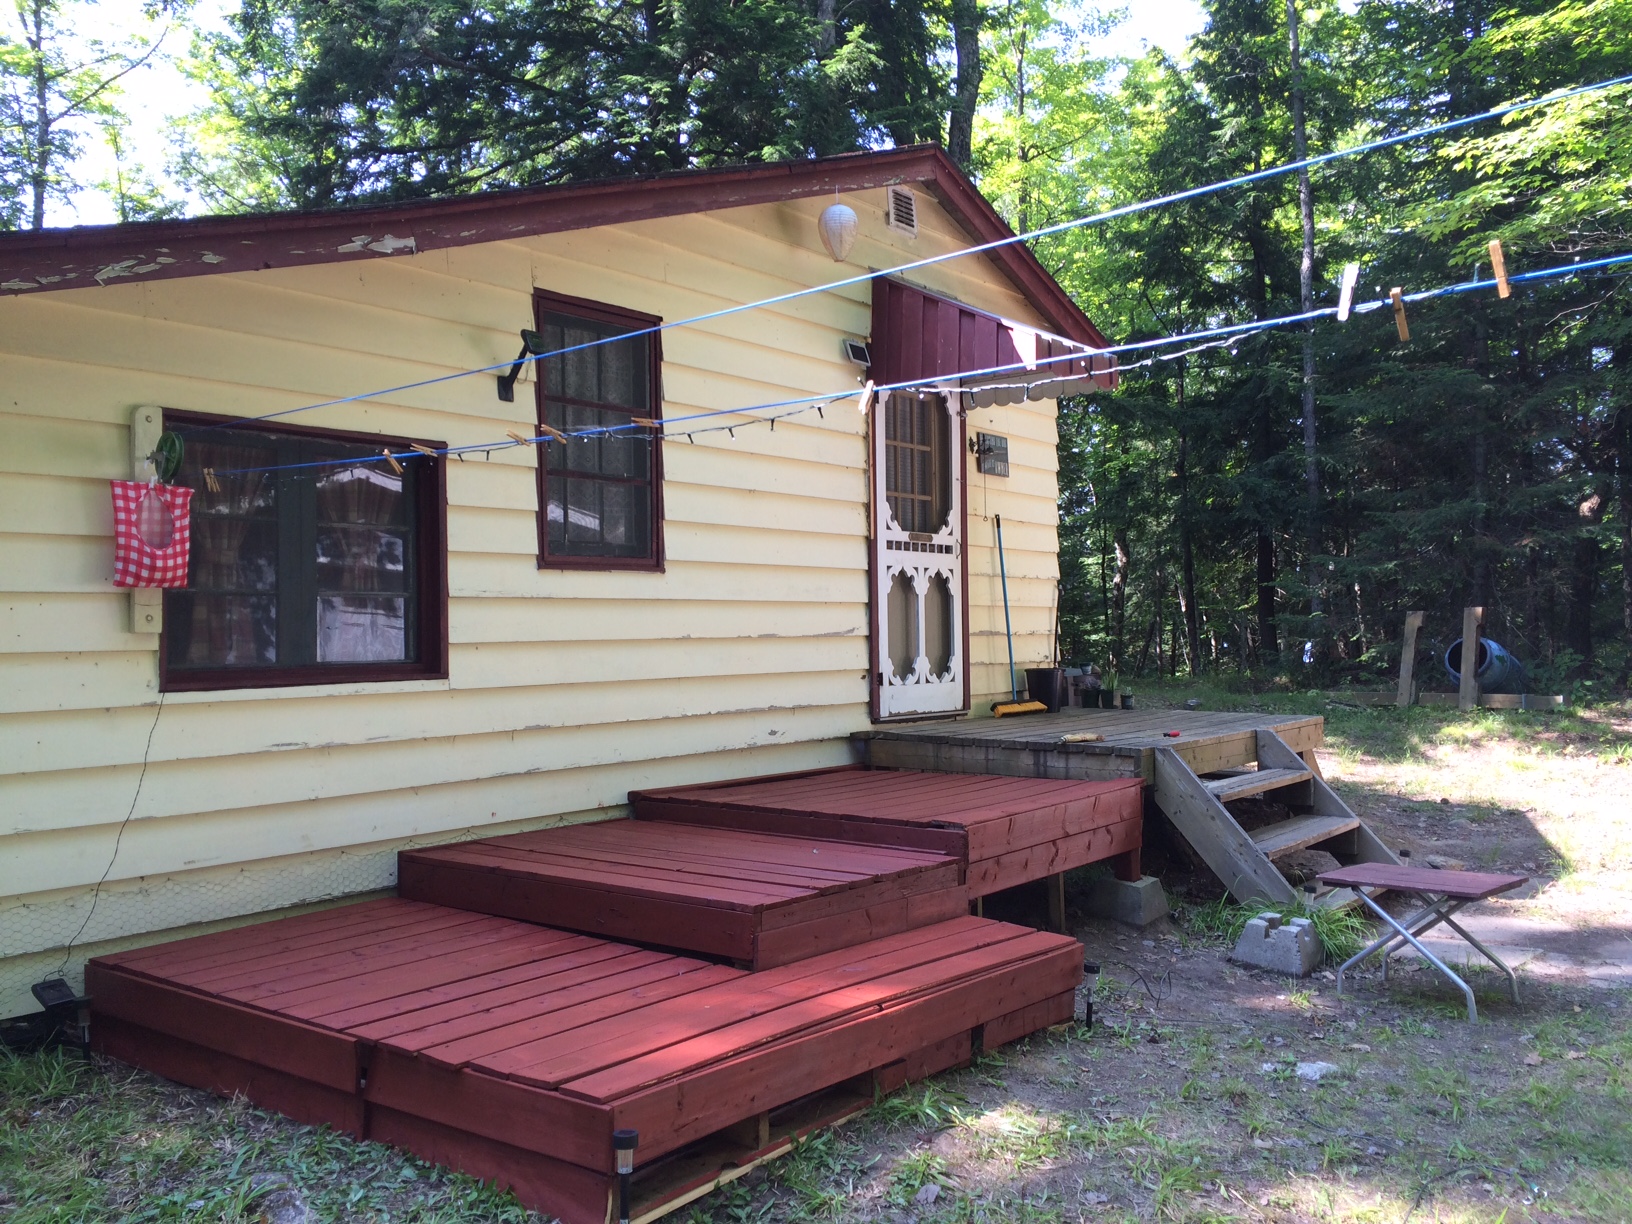
As is clear from the photo, we still did not manage to get it exactly level but when you stand on it, you don’t notice it. We are very happy so far with the “design” (aka Put the Pallets Wherever They Fit). One thing we did not anticipate but worked out very well is that these tiered steps are shorter and wider than regular stairs and therefore much easier for Soldier Boy, who is now on crutches after ankle surgery, to go up and down. We could also add some pallets to extend the second section but the dogs have adopted that section as their “cave” to keep cool when it gets hot. We have CIL Woodcare stain in Redwood to match the trim of the cottage and to add a few more years to the life of our first deck.
Material costs:
- Box of deck screws: $10 (and we have a kabillion left over)
- Sakrete: $4 (and we have most of the bag leftover)
- Lumber from Home Depot: $30
- 2 gallons of CIL Redwood stain: $35 each (yes, one can of stain alone was almost as much as all the other supplies put together)
- Found lumber, footings, pallets: Free
- Child Labour: Free
Total cost: $114 (with plenty leftover that when we make the deck along the front of the cabin, we will only need to buy the lumber)
Using pallets is a great way to save money and buy some time when learning your way around tools and the art of building. If you’ve made something with pallets, what are some tips you’ve learned from the experience?

One thought on “The Pallet Deck”