Let’s face it, nobody likes going in an outhouse. Those of us that have one understand that it’s a necessity and we quickly move past the smell and the bugs and the gaping black hole beneath us. Since I’ve been an outdoor lover all my life, I have memories of going in some really rustic ones (which is the polite way of saying “entirely neglected, nasty, falling apart shitholes”. Pardon the language.) or on long hikes, just going in the woods. It takes some getting used to. But I will take these more natural settings over some public toilets I’ve had the misfortune of seeing, any day.
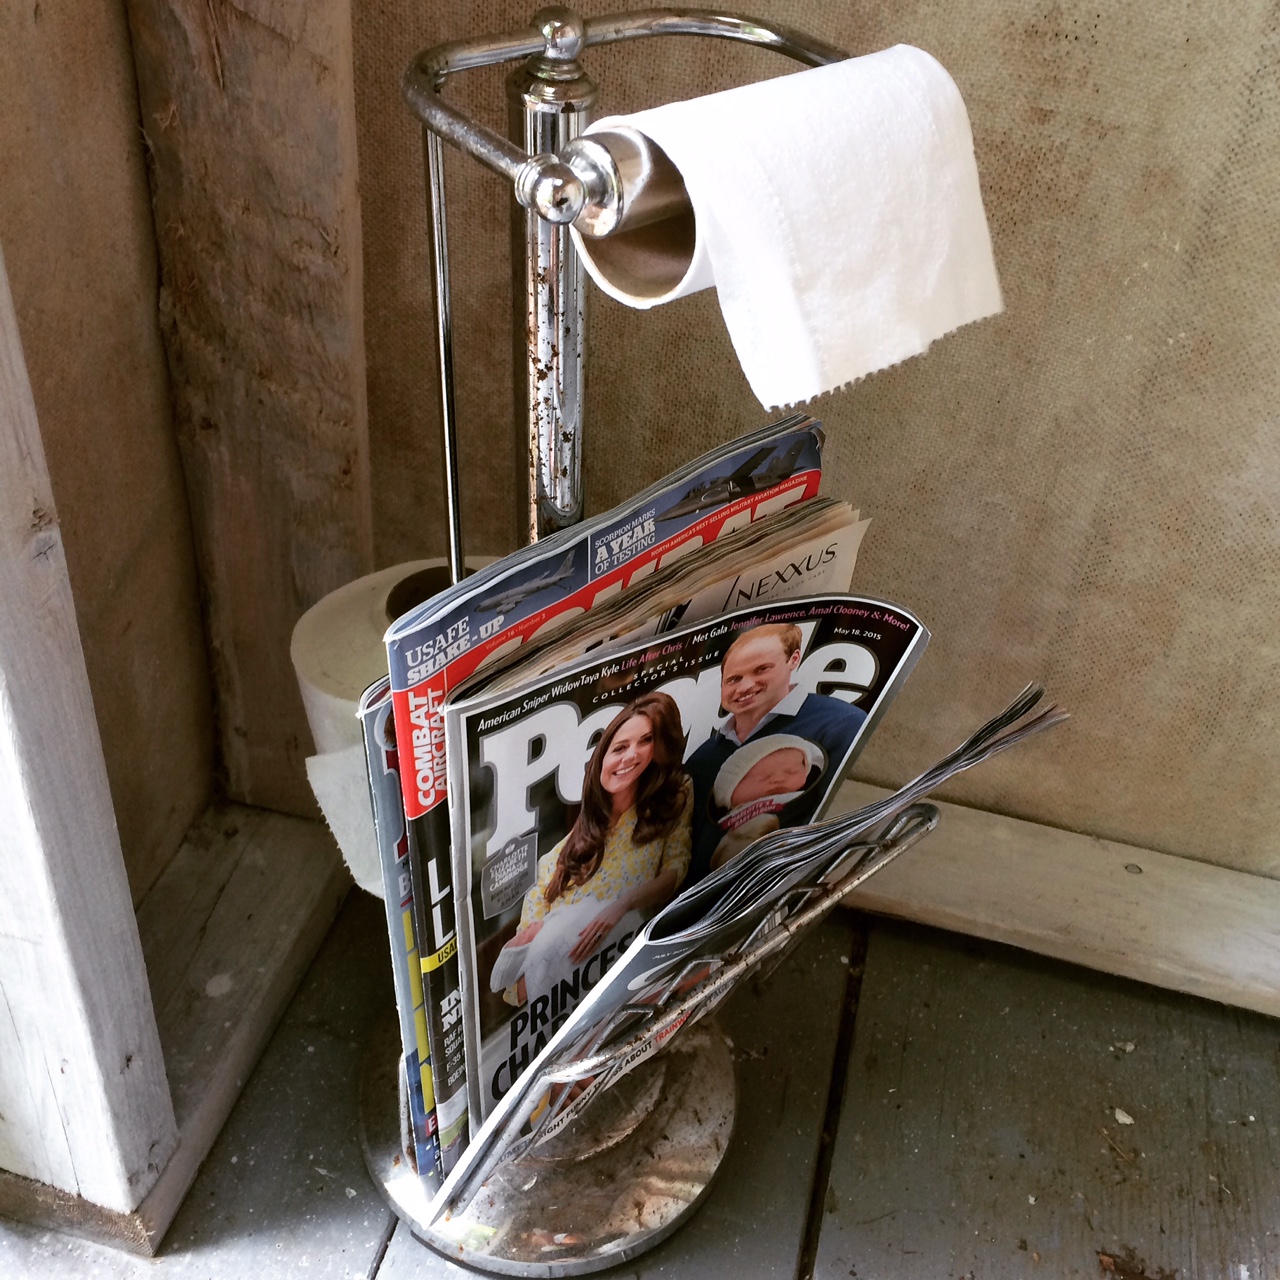
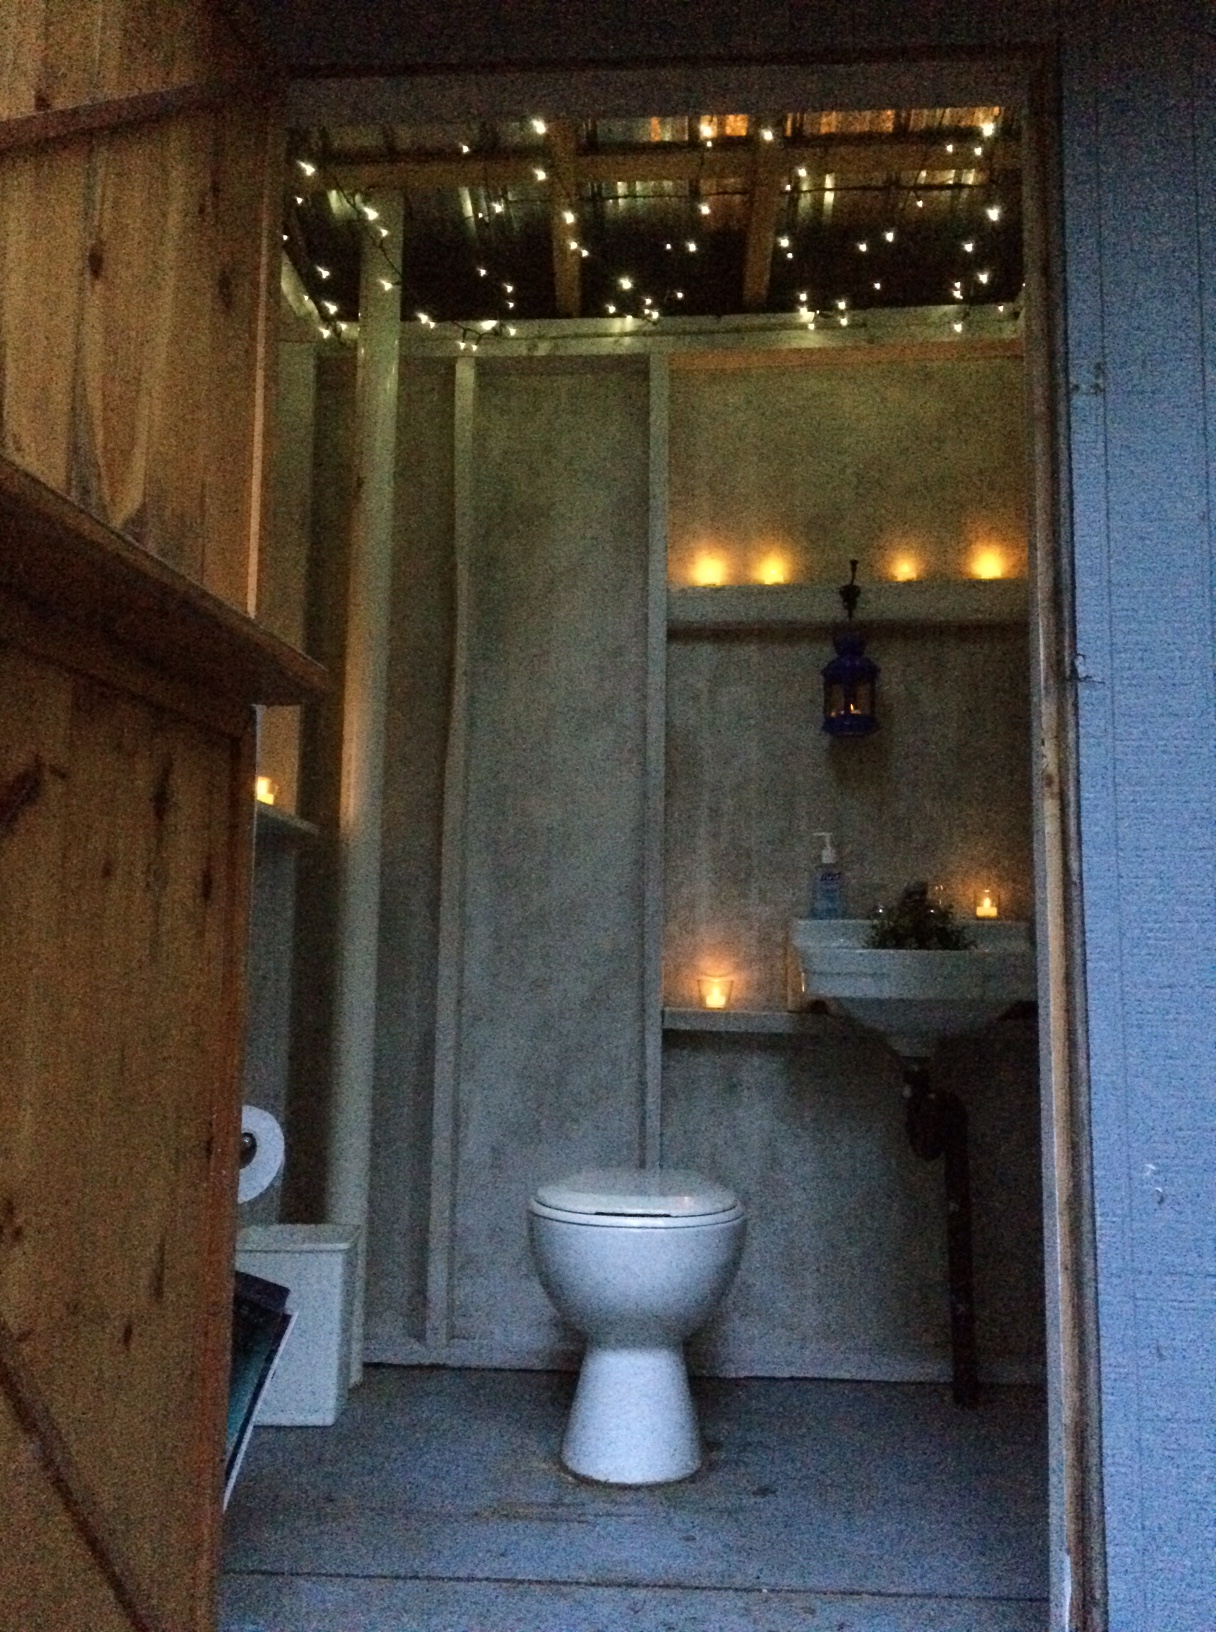
The one that we got with the cabin was actually in really good shape. Though the cabin and its accompanying buildings had fallen into disrepair within the last few years, it is clear that our little cabin was at one time dearly loved. The outhouse was structurally sound, built from rough lumber and fibreboard and painted a light blue colour. It has a dutch door, which might be considered exposing to some but considering the outhouse is behind the cabin in a shelter of trees, it is quite often left open to let in light. Speaking of light, it has a skylight as well. It has a white porcelain toilet in it which makes it feel a little more inviting right from the get-go and a porcelain sink that is a remnant of a rain barrel system that we hope to resurrect one day. It even had a standing chrome toilet paper holder.
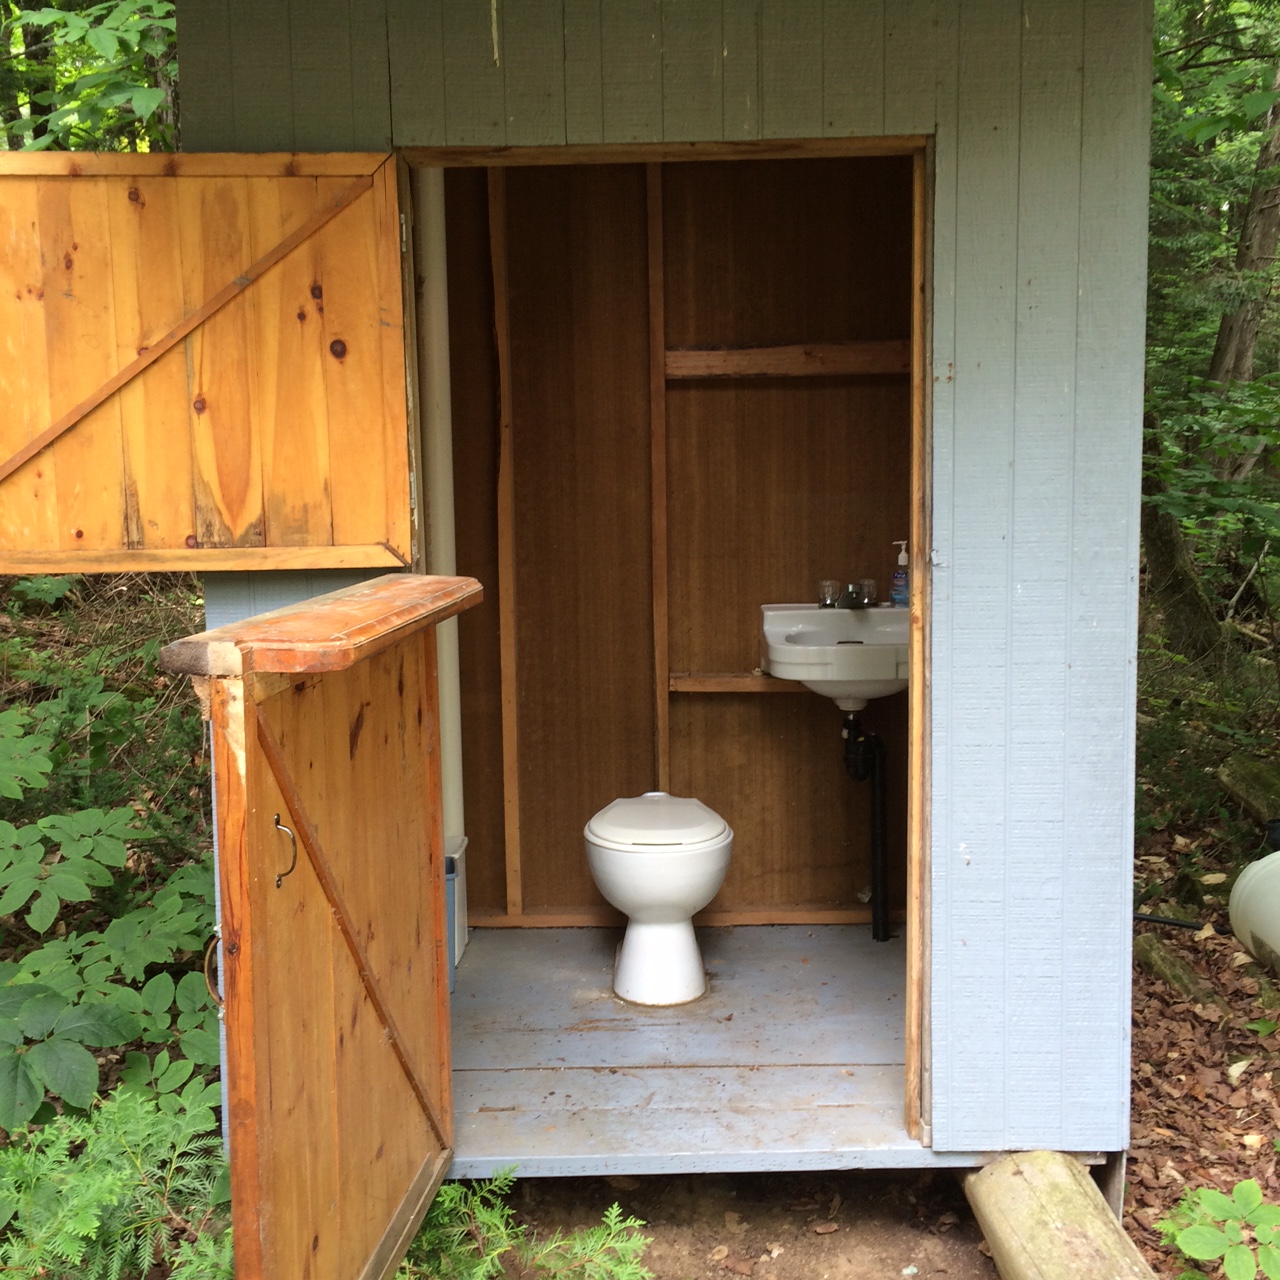
The challenge was before me: how to make the outhouse a place where people wouldn’t mind going. So I checked out Pinterest and I was inspired by the outhouse this blogger built. Awesome sauce.
I was not interested in actually building anything new into our outhouse but I knew a fresh coat of paint and some decorative accents would make a difference.
First things first. Rid the outhouse of wildlife. The bee? Gotta go. Sorry dude, but we are reclaiming our space. The wolf spiders? Outta there. Can’t tell you how many flyswatters I mangled trying to kill these mo-fo’s.
Next, paint the walls. It’s an outhouse – 4’x4′ at most. How long could this take? I’ve got half a gallon of white paint, I’ll mix it with rain water to get the desired whitewash look and voila! Beauty! Two hours max.
Annnnnnd……..two DAYS later, I finally finish painting. Oh. My. God. Painting fibre board is the most frustrating thing in the world. Here’s what happened:
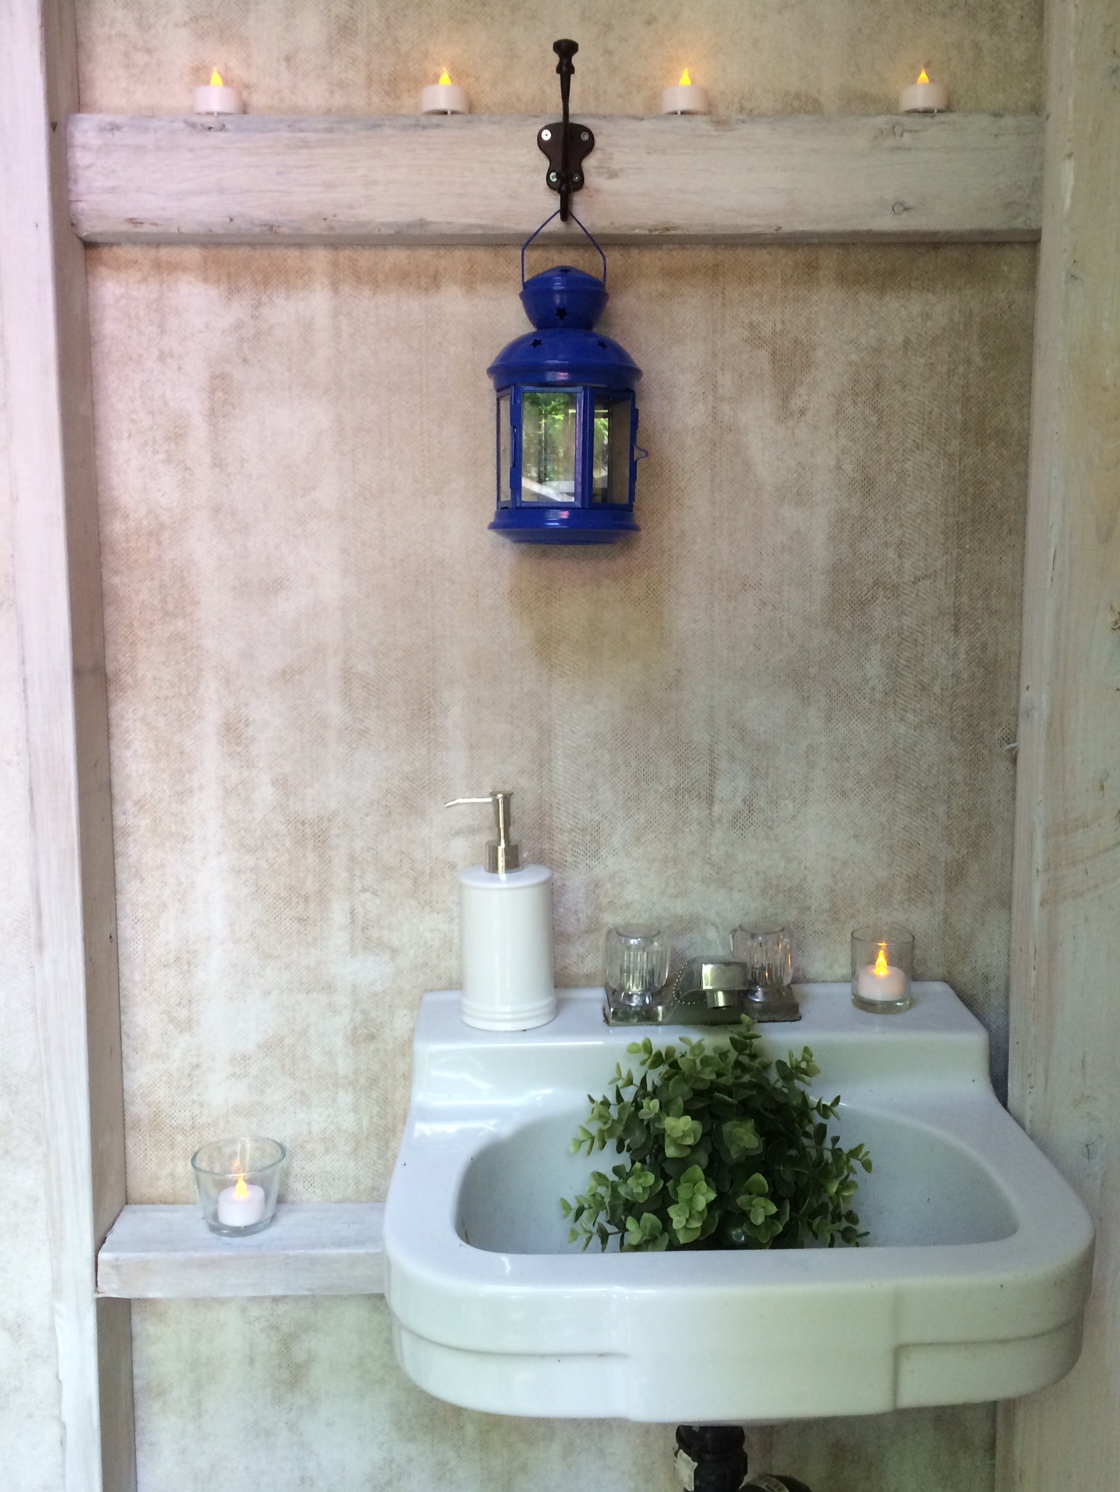
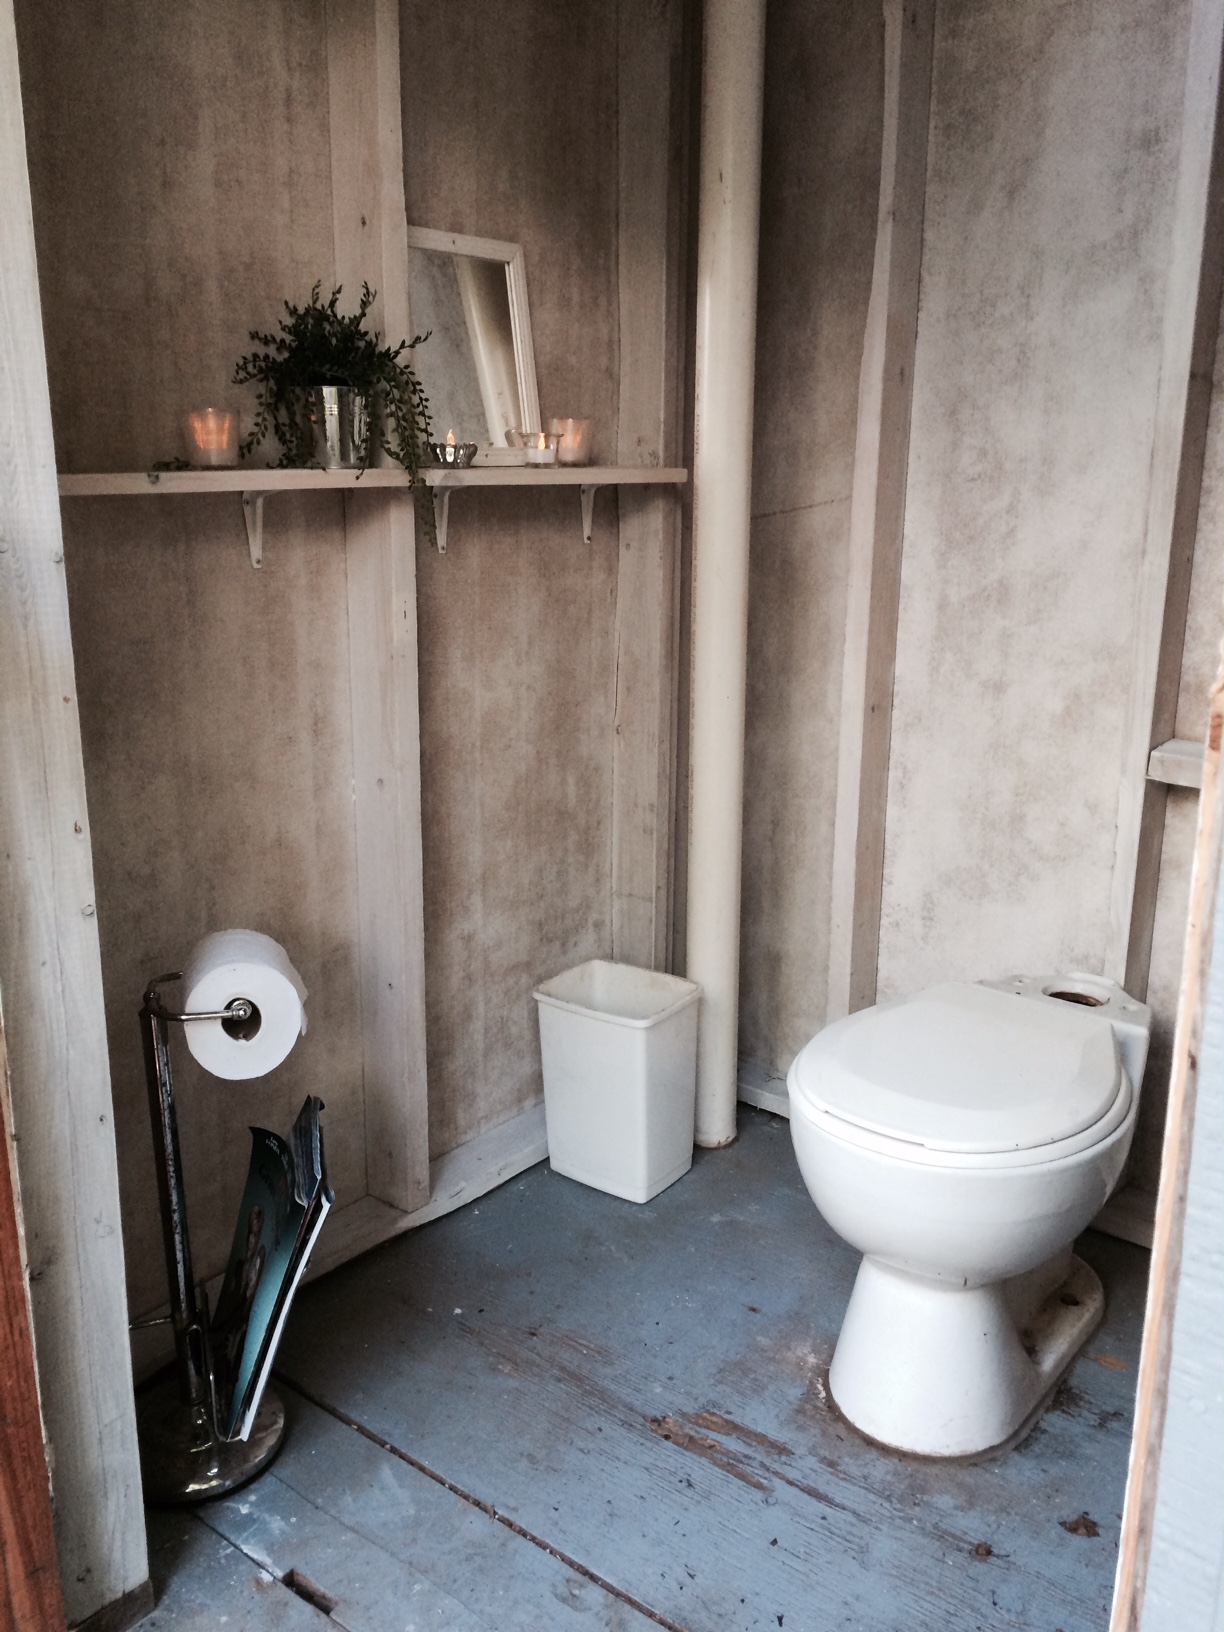
Now that the walls were finished I could add in the decorative accents that would finish it off. I had two artificial plants at home from Ikea that I brought out. The artificial plants from Ikea are inexpensive ($5 – $7) and quite nice looking. I bought a set of three small tin plant pots from Dollarama for 3$ and the plants fit perfectly in them. I found a white soap dispenser from Value Village for $2 for the hand sanitizer. I had also found a white box to put a tissue box under that I thought would be nice. But when deciding what to put in an outhouse, one must always consider what sort of creatures might think it was a good home. The thought of lifting that tissue box cover to find a wolf spider or a bee has made the perfect home inside it did not fill me with warm fuzzies. I added some magazines and an extra roll of toilet paper to the tp holder for longer stays in the privy.

Soldier Boy was beyond excited that I gave him the job of building shelves. He is still on crutches and being forced to just sit around and watch my DIY madness is not fun. He did such a great job that I think I’m going to get him to make more shelves so I can add a few more tealights. I’d also like to make a fun sign that lists some “Outhouse Rules” and put it in a white frame on one of these to-be-built shelves.

Material costs:
- Paint: free (leftover from retouching the baseboards at the house)
- Wood for shelves: free (leftover from the deck)
- Artificial plants: we’ve had them for a few years in the house but they are $5 – $7 from Ikea
- Set of 3 small tin pots: $3 from Dollarama
- Electric tealights: $2 package of two, from Dollarama, currently 10 in use
- Tealight holders: free (donated by family when we bought the cabin because we have no electricity)
- Solar fairy lights: $30 from Canadian Tire (reg. $50)
- Black hook: approx. $3 from Home Depot
- Blue lantern: $4 from Ikea
- Owl tealight holder: $3 from Dollarama
- Small mirror, toilet paper stand and ash bin: came with the outhouse
- Wolf spiders, moths and giant bumblebee: free
Total cost: $65
So, after two days, I had transformed the crappy crapper into a pretty privy. And when I finally finished, I was lying on the couch, with ice packs on my shoulders and a bottle of wine close beside me. I can’t guarantee that I’m going to get more visitors to our cabin because of the makeover. After all, it is still an outhouse. But I am certain that those who do brave it, will at least appreciate the effort put into making it more comfortable.


Great job on your outhouse! Thanks for linking back to my outhouse too 🙂 LOVED your video! It is sooooooo true, as with most projects…you imagine that it will take no time at all and it takes f.o.r.e.v.e.r. Crazy, but worth it. Happy DIYing !!
Much love,
Lynne from Design The Life You Want To Live
LikeLike
Great job on the outhouse and your blog. I’m really enjoying your posts. We will be making an outhouse but if it takes as long as it is taking to do the roof it will be awhile.
Anna 🙂
LikeLike
Glad you are enjoying it, Anna! All these projects are so much fun (and of course, a little frustrating, but that’s only normal.) We sooooo need to talk about roofs.
LikeLike
Nice blog thhanks for posting
LikeLiked by 1 person