We first noticed the leak in March when we went and spent three days at the cabin in the winter. It was -23 and we stoked the cook stove until it was a broiling 25C inside our wee cabin. And that’s when we heard it. The incessant <drip, drip, drip>. The snow on the roof was starting to melt. Well, good thing we found it because we had all of the spring thaw to get through. At least we could stick a big bucket underneath it and try to salvage the floor.
 |
| This is what we saw when we bought it. At that time we hoped that it was just cosmetic. |
Usually, to check a leak, one would drag a hose up and run water over the roof to find where exactly the leak is coming from. But since we have no running water, we had to just make our best guess. We all figured the culprit was the skylight. The water damage shown above is about two feet directly down from one side of the skylight. The water damage continues in to the middle bedroom in a perfect line. It was a pretty good bet that the water was seeping in somewhere around the skylight and travelling down a joist before dripping through the ceiling tiles.
With flashlights, we could see that the one exposed joist under those tiles was black from mold and rot. Ugh. What else were we going to find up there?
We went onto the roof to take a look at what was up there. My brother was first one up and said that the majority of the roof felt quite solid. The roof in line with the skylight was a bit spongy. Good to know.
This red tape is rubbery on the back and an absolute gong show to try and pull off. When we did, it revealed huge cracks in the roofing tar that had been applied under it. HUGE. So huge, pinecones were sitting in them. (Yes, and then someone taped over the pinecones.) It was so foreboding that we decided we’d better just remove the skylight and start again. But before that, we needed to check the inside of the cabin to see what damage had been done on the inside.
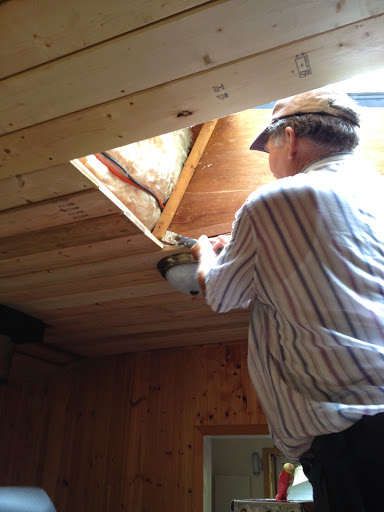 |
| Russell (my sister-in-law’s father who was happy to come and share his DIY expertise with us) opens up the walls on the inside of the cabin around the skylight. |
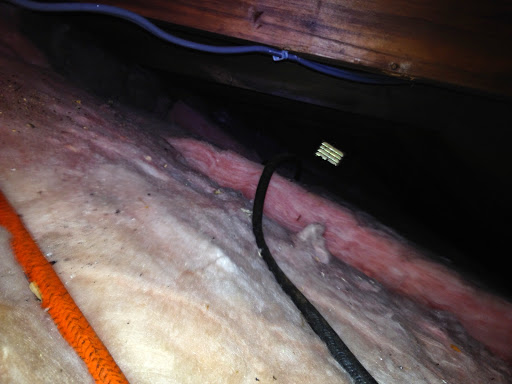 |
| Surprisingly clean and dry batting. Well, that’s promising. |
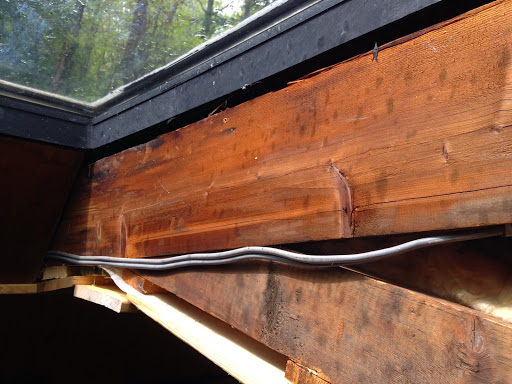 |
| The joists are also dry and show very little sign of water damage. The lower one has some black spots, but that could be from condensation between a warm cabin and cool air and not the leak. |
Since the damage seemed to have left the vicinity of the skylight itself, we decided to just leave the skylight in, tar around the seams again, put proper flashing around the skylight and then tar it again. It certainly wouldn’t be pretty but let’s face it, this roof is going to be replaced in its entirety in a few years anyway.
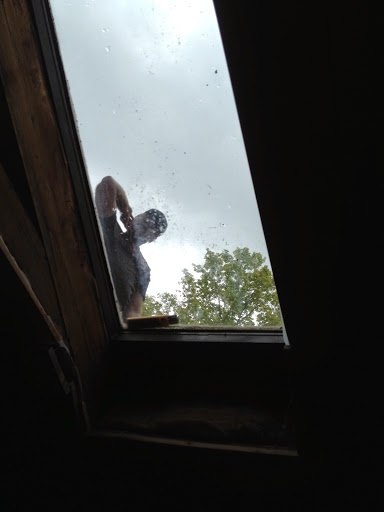 |
| Eric is deciding on our next steps. |
Roofing tar is disgusting. It is horribly sticky and it gets on everything. EVERYTHING. I ruined every piece of clothing I wore that day. Thankfully I was wearing cottage clothing anyway, except for my running shoes. So now I have new running shoes and the tarry ones are for the cottage. It got on all the tools, all over our clothes, and our hands, not to mention all over the roof.
I was expecting it to be thick like molasses but instead it was quite runny. It started to thicken as it was left out longer but because it was so runny to begin with, it started doing this.
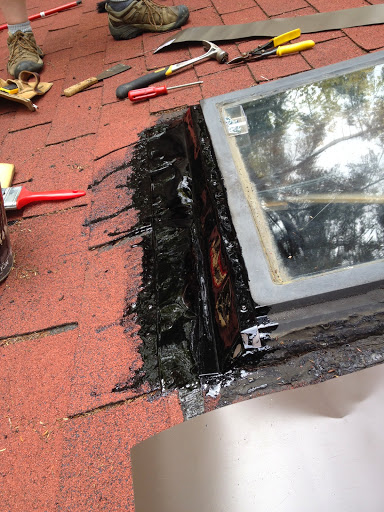 |
| It ended up dripping down about a foot from the skylight. Also, you can see the huge crack in the previous tar along the un-tarred side. |
Then we attached metal flashing in the proper order – bottom first, then sides, then top. I remember being amazed when I learned that flashing worked on a very simple principle – water doesn’t flow up. As long as the uphill side of the flashing is covered, there shouldn’t be a leak. The top layer of flashing was wide enough to bend over the ridge of the roof so that no water would drip under it.
But we weren’t taking any chances and after applying the flashing, we tarred the entire thing again, especially over the nail heads. And then I did it again the next day to make sure that it was coated well.
 |
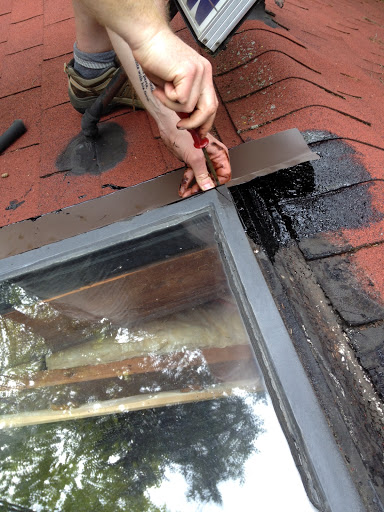
| Pretty ugly. But I don’t care as long as the leak is fixed. |
A week later, we returned with two tubes of roof caulking. This time, I caulked all the seams and nailheads.
 |
| Starting at the top and working my way down. It reminded me of cake-decorating. |
It sure ain’t pretty but we wanted to err on the side of caution. It’s raining today but alas, we are not at the cabin to see if we actually fixed the leak. But with everything we did and with so many people with more experience than I saying that it couldn’t be worse than what was there, I feel confident that if there is still a leak, it is most certainly NOT from the skylight.
Material costs:
Flashing: free from my brother (leftover from his trailer)
Roofing tar: free from my other brother (leftover from his shed)
Roofing nails: free from my brother and a friend (leftover from their own roofing work)
Screws: free from the cottage shed
Ladder: borrowed from a cousin and Russell
Roof caulking: $6 from Home Depot and $4 from Canadian Tire (but the more expensive stuff was easier to work with)
Caulking gun: $5 from Home Depot
Total: 2 brothers, a friend, an 80-year-old DIY genius, a cousin, a cottage shed full of unknown wonders and $15.
