A couple of Christmases ago, I found a Sons of Anarchy dartboard in one of those shops that sells cult TV show paraphernalia. I bought it for Soldier Boy because he’s an avid fan of the show and we had recently refinished the basement of our house so we actually had space to play darts. But because we haven’t had a lot of practice with darts and we had just refinished the basement, we couldn’t actually bring ourselves to play for fear of damaging the new walls with our terrible aim. So I went to Pinterest (if you’ve read other posts, you’ve realized by now that I firmly believe the solution to everything is on Pinterest. Even world hunger, I’m sure.) and found this wicked idea for a backboard made of corks. Wait a second…you mean, now I have another excuse to drink? Awesome!

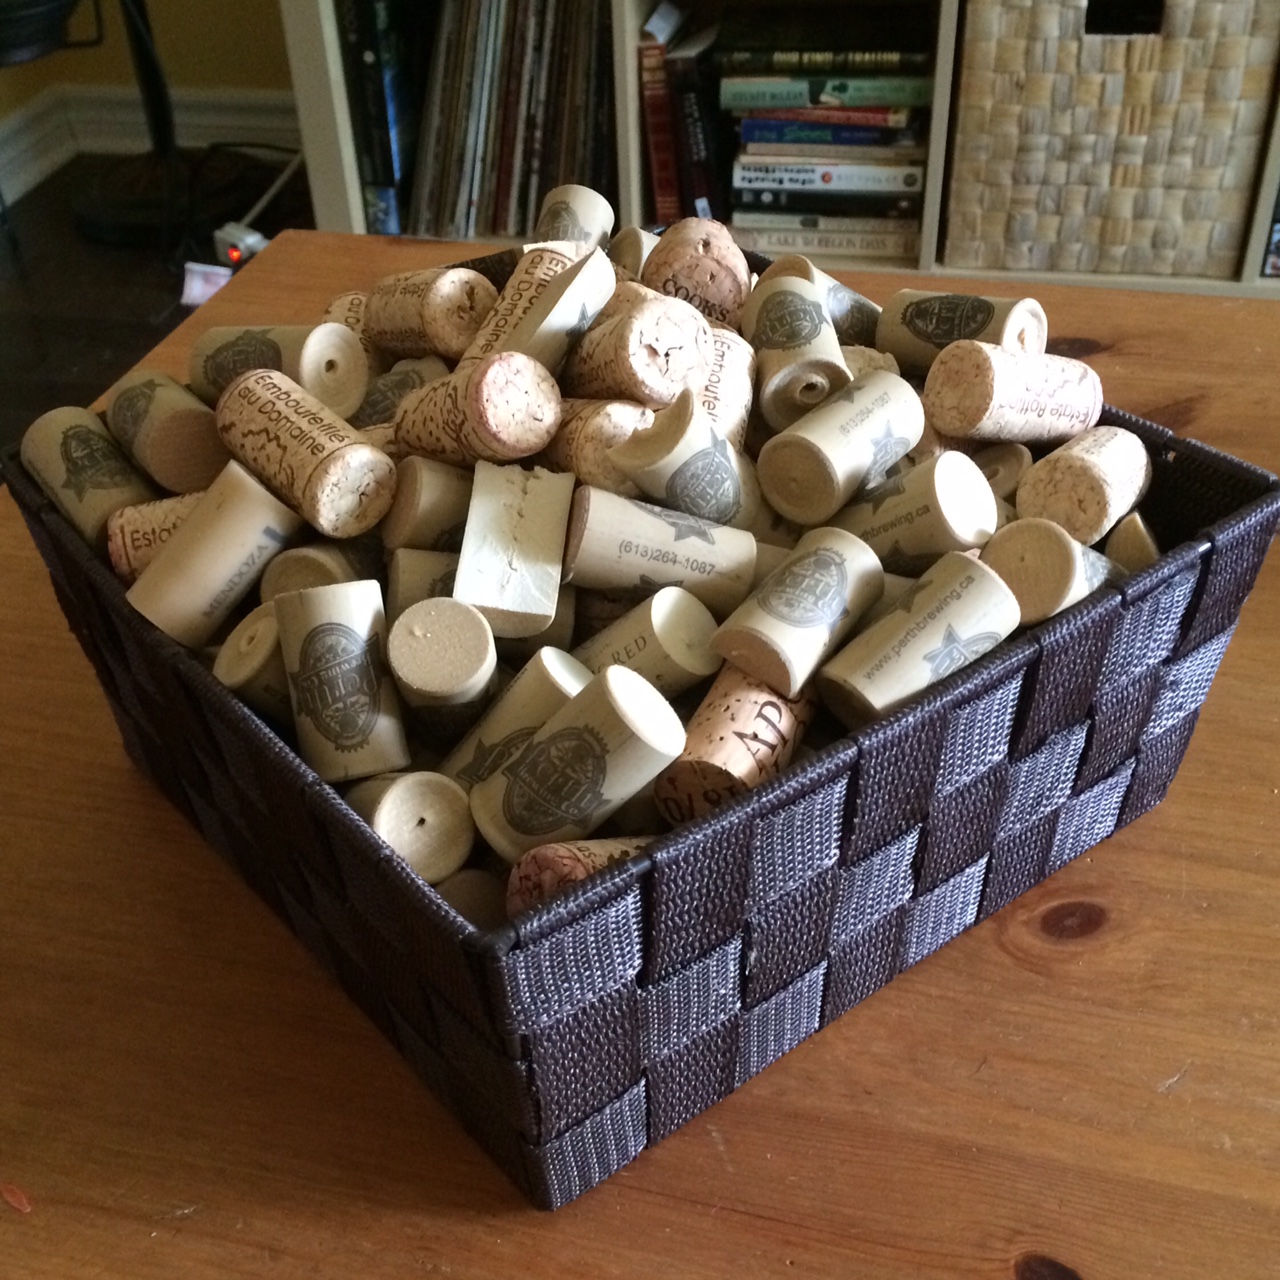
In reality, however, that is an incredible amount of corks. Which means an incredible amount of wine. Which means an incredible amount of time and money. In fact, the person who made that particular backboard used over 1000 corks and it took them over a year to collect them all from friends and family.
So in winter, when I discovered this idea, I put the idea out there on Facebook to all my friends and family to save their corks! Here’s a few things I learned. First, wine is often bottled with twist caps now. This project might lead a wine drinker to discover new brands or types of wine if your usual one no longer uses corks. Secondly, if you do buy wine with corks, it is becoming more regular to see synthetic corks, instead of real cork. Other than a slight difference in colour, it makes no difference for this project whether the cork is real or synthetic. In fact, if your aim is as bad as mine, then the synthetic corks are not only easier to cut in half but also more durable to have darts stabbing them. Third, it takes a very long time to amass this many corks considering the first point. Corks are available from wine-making stores for sale in bulk but that defeats the purpose of this particular project being free or recycled and we wanted to stick with our idea of upcycling as much as possible.
After 7 months, I finally had enough corks to start the project. I had colleagues bringing corks to work and friends scavenging corks after dinner parties but to my surprise, it turns out that my parents were the biggest contributors. I must say, I was a little surprised and thought they had just gone to the local winemaker and bought a bag in bulk. But no, each cork has a corkscrew hole in it. Man, I can’t wait to be retired!
We had originally intended to move the dartboard out to the cabin because we thought it might get more use out there. But as I thought about it more and more, I wondered if there was a way to make the backboard light enough to be portable. That way we could bring it out to the cabin in the summer and bring it back to the basement (which we never use in the summer) for the winter, when we would be spending minimal time at the cabin. In order to begin, I needed a frame and backing to support the corks. The person who made the original idea actually made the backboard support out of old plywood. But I couldn’t do that because that would’ve made the whole backboard extremely heavy. While our walls in our city house could handle it, the interior walls of our cabin are simply covered with panelling and unless the dartboard is hanging from a stud, the walls won’t hold something as substantial as his project. But I had a solution.

The previous owners of the cabin graciously left us all their junk when we took possession. And in said junk, we found a massive frame with a Bob Ross-esque painting in it. The frame could hold a 24″x36″ canvas. It just so happens that Staples sells foam board for presentations in those dimensions. (In my store, I actually had to buy a three-way folding board for $15 and the centre board was 24″x36″.) I stapled the black foam board into the frame with a staple gun.
Doing a rough calculation, I knew I didn’t have enough corks to use each one whole. So to save on corks and to lessen the weight of the entire project (I know, I know, corks don’t weigh that much anyway), I decided to cut each cork in half. Yes, this is a time-consuming and sometimes frustrating task. But I found a rhythm during my morning coffee and each day, I could cut enough to get three or four rows glued down. I used an X-acto knife to cut them in half and a dollar store glue gun to glue them down. The synthetic corks are actually easier to cut than the real cork ones but I didn’t have any issues with the real corks crumbling. If you do, I’ve read that you can soak them in water to help prevent crumbling. If you are wondering how many glue gun sticks you’ll need, I used one 4″ stick for every row, about 2 packs of 16.
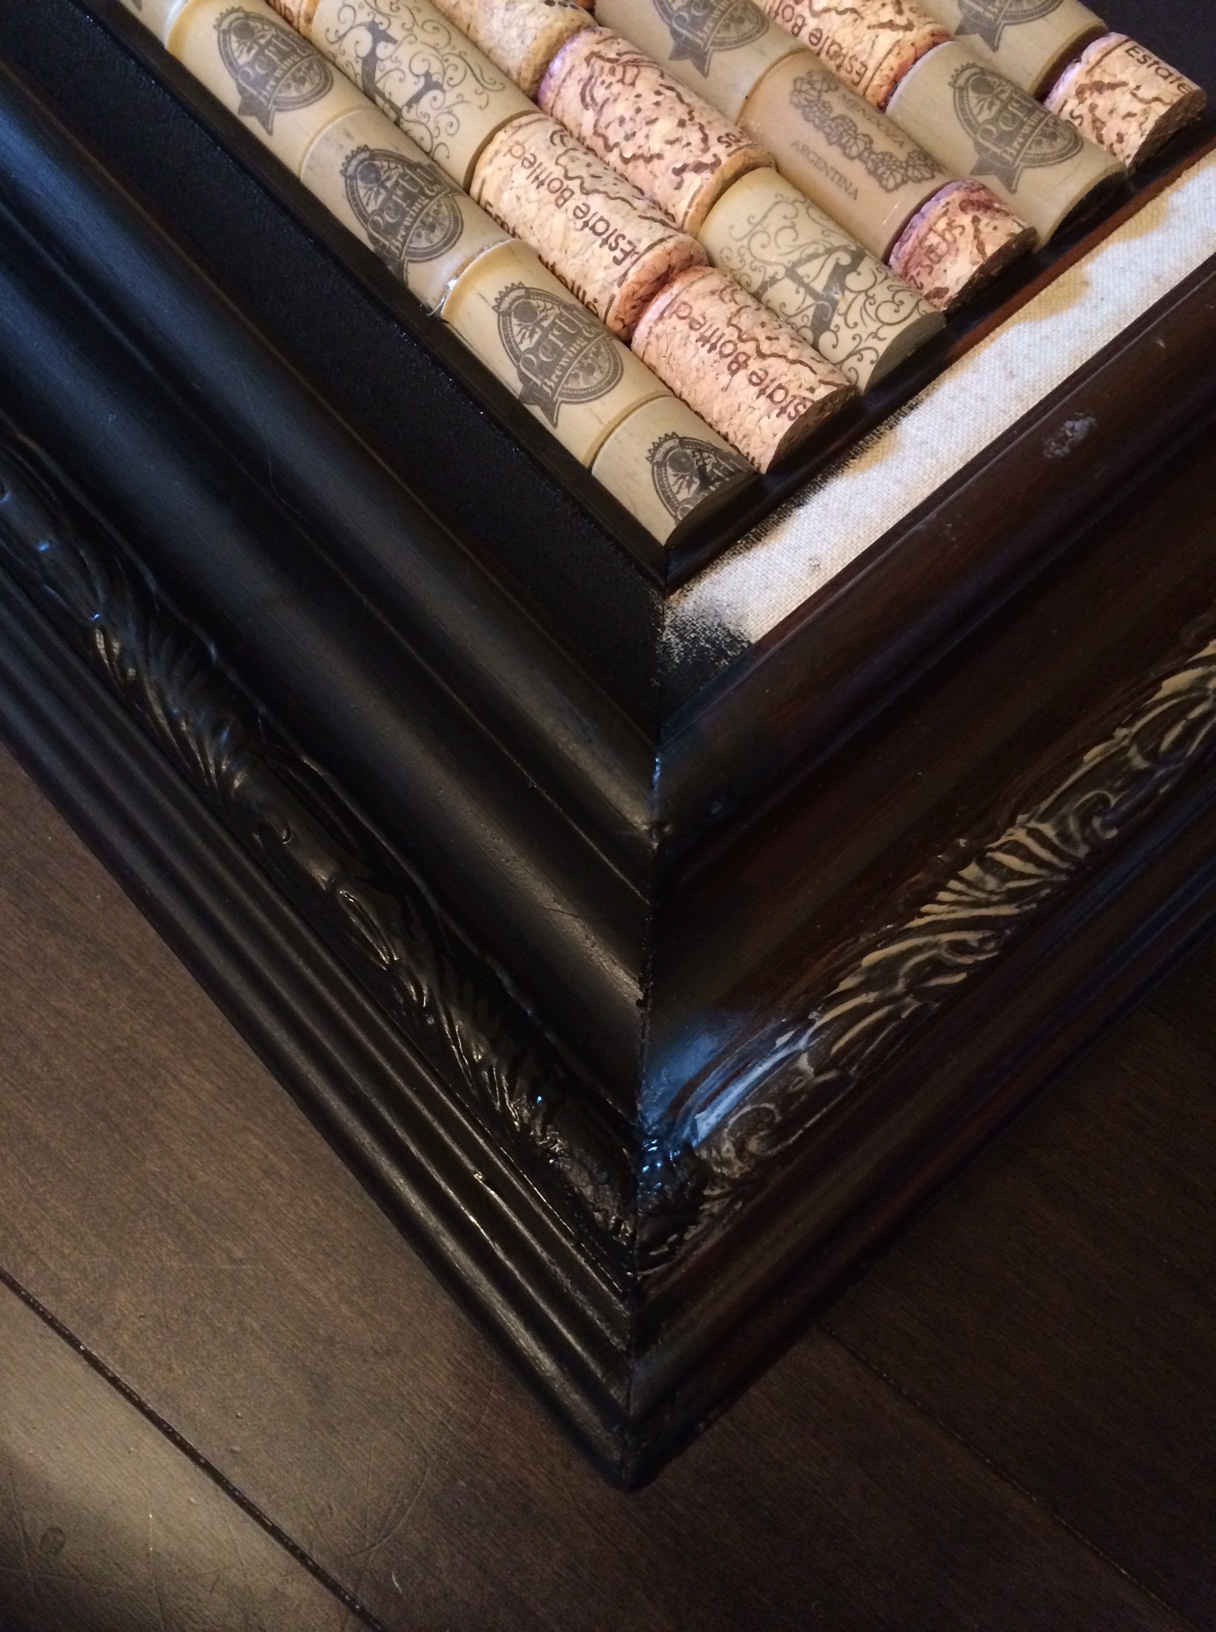
As I started to glue them on, the colouring of the frame started to annoy me. I thought maybe I could use it as-is, but with the oldish-world look of the corks added to the oldish-world look of the frame, I knew that the Sons of Anarchy dartboard would lose its cool factor. Using dollar store craft paint, I simply painted it black.
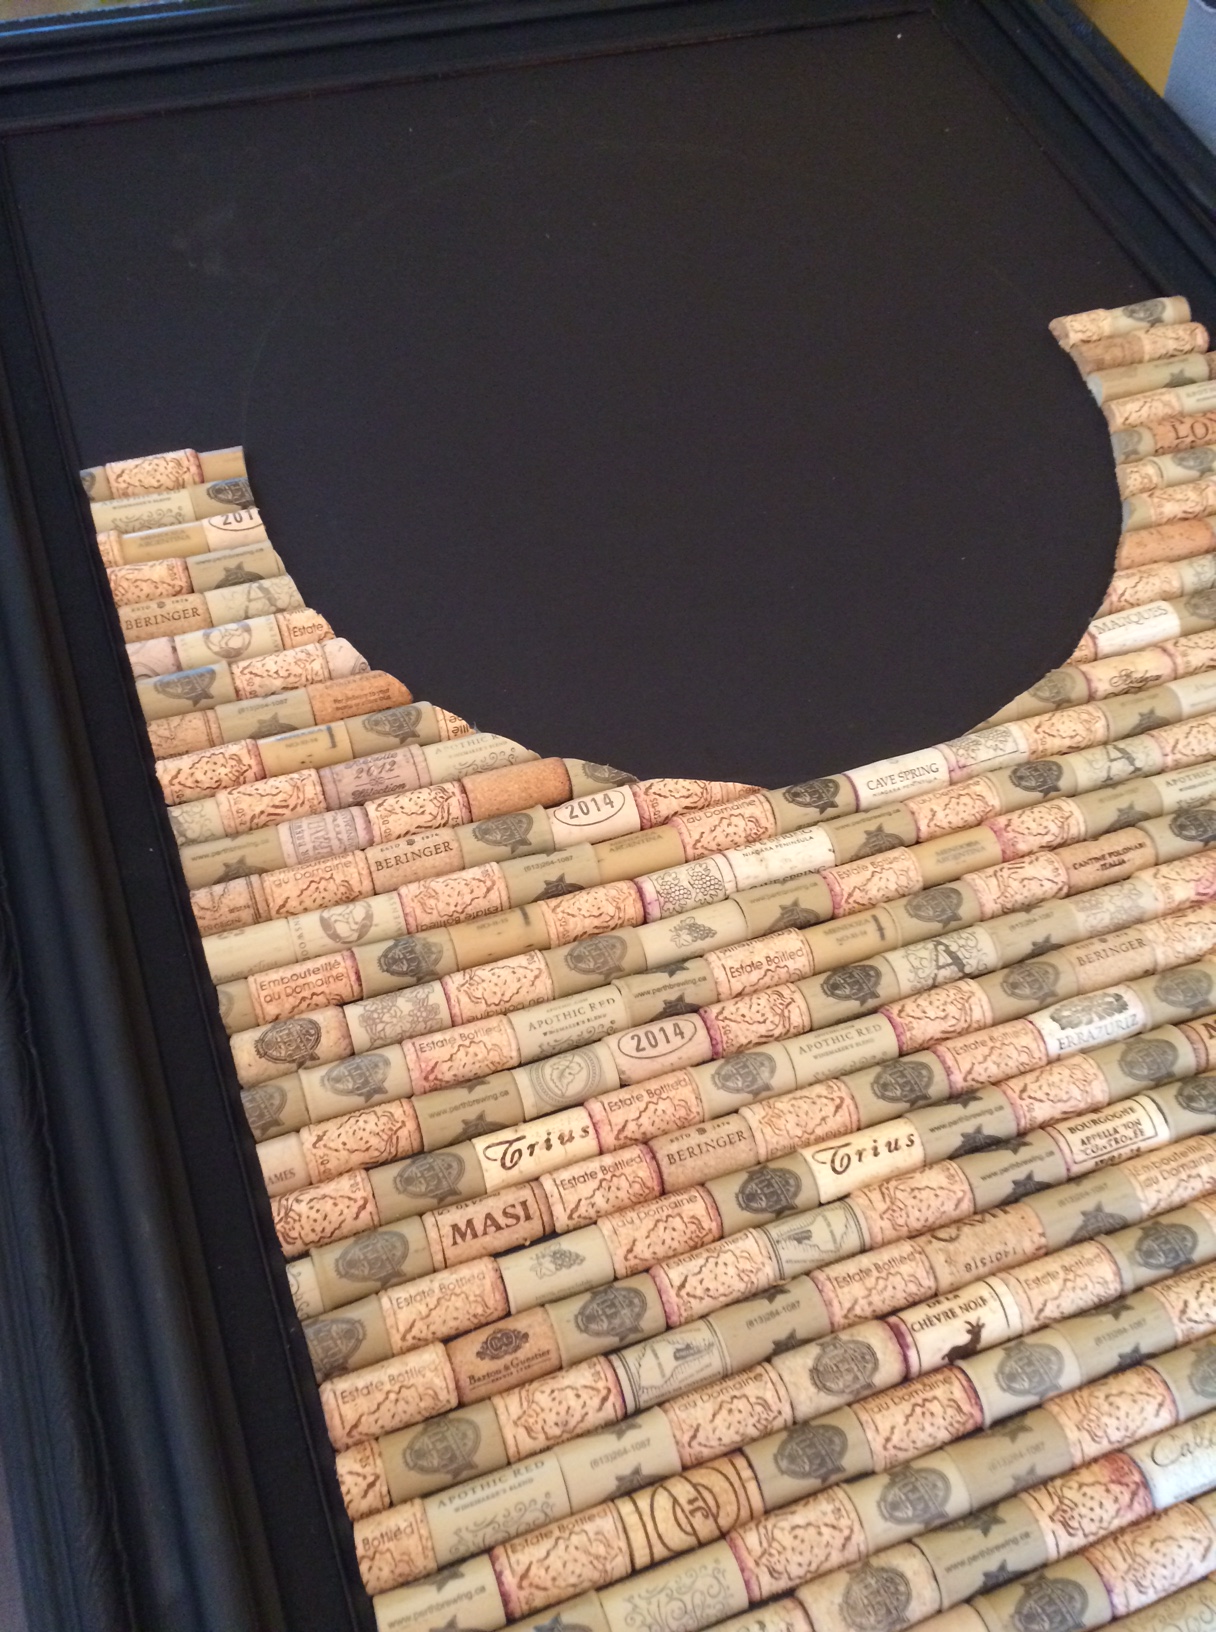
I also didn’t want to waste corks behind the dartboard so I positioned the dartboard where it would eventually hang in the frame, drew a circle in pencil around it and then cut and glued the corks around it.
When all the corks had been glued on, the dartboard fit perfectly. I decided to use two different supports for the board. I nailed a long, sturdy nail through the corks and into a stud so the dartboard itself could hang on the nail. To hang the frame, I used typical picture hanging wire with two nails in the studs to either side of the centre one, from which the dart board was hanging, thereby distributing the weight.
The dartboard is actually held in by the corks surrounding it and not attached to the foamboard in any way. The first reason was because I didn’t want to damage the dartboard. But now that it’s finished, I can tell you that the whole backboard is NOT going out to the cabin until the walls out there are made with stronger materials. The whole thing weighs about 10 lbs! Which is a significant weight to try hanging on a flimsy wall. Until then, we can simply take just the dartboard out to the cabin and if our aim destroys the walls out there, well, then, I guess we’ll just have to re-do them. Darn. I loved that 1970’s paneling <insert sarcastic look here>.
However, in our basement, there is enough support in the walls to hold it. And here’s what it looks like.

Material costs (not including the cost of all the bottles of wine or the dartboard):
- Glue gun sticks: 2 packs of 16 sticks at $1.25
- Frame: free from the cabin
- Staple gun, staples, X-Acto knife, cutting board, black craft paint, brush: Already in my crafting tools
- Foam Board: $15 from Staples
Total cost: $17.50
A special thank you to all the lushes out there who contributed to this fabulous work of art. You know who you are.


This is probably the best looking wine cork dartboard mount I’ve seen. Congrats! I’ll have to make one of my own soon
LikeLiked by 1 person
Thanks! It took a while but I’m really happy with it.
LikeLike
One of the best articles that I’ve read in a very long time! I Took notes and surely gonna implement and test bunch of stuff you talked about.
You’re a beast! Cheers, Ash
And don’t forget to visit thebestpickers
LikeLike